Install Theme via FTP
Follow the steps below to learn how to install theme via FTP
-
Step 1: Login to your hosting space via an FTP software
-
Step 2: Unzip the Amy Gallerix file and only use the extracted Amy Gallerix folder
-
Step 3: Upload the extracted Amy Gallerix folder into wp-content => Theme folder
-
Step 4: Activate the newly installed theme by going to Appearance => Themes and click on Activate button to activate theme
Install Theme via WordPress
Follow the steps below to learn how to install theme via WordPress
-
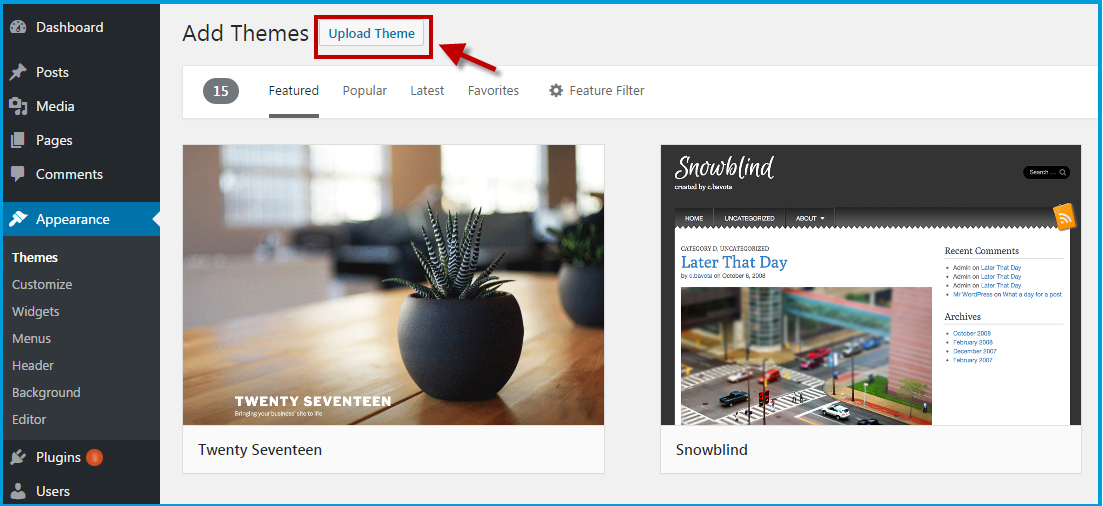
Step 1: From backend, go to Appearances => Themes => Add New button, click on Upload button at the top of the page
-
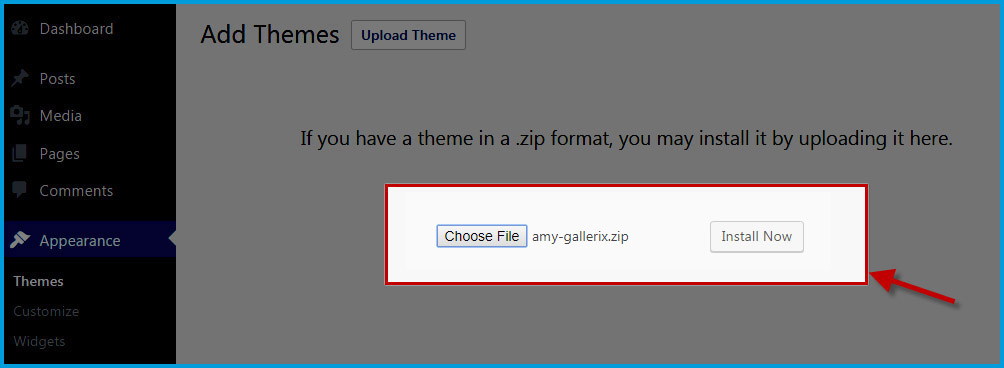
Step 2: Click on Choose File to choose theme from your local computer, the file requirement is zip format. Press Install Now button to install theme.
-
Step 3: Wait for few seconds, the theme will be uploaded and extracted automatically by WordPress. After this process complete, you only need to press on
Activate link under the message for successful installed theme.
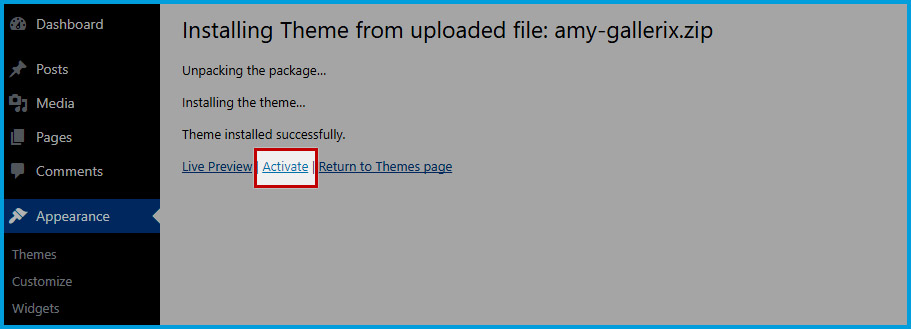
Once you ativate Amy Gallerix, you will receive notification message to install plugins. Follow the steps of Plugins Installation part below to learn how to do this
Plugin Installation
How to install required and recommended plugins for Amy Gallerix
-
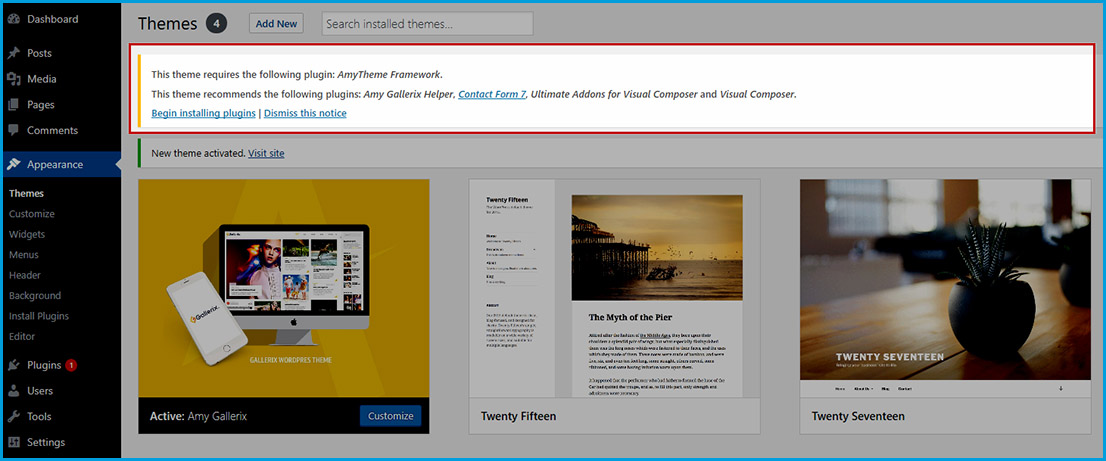
Step 1: Once you activate Amy Gallerix, you will receive a notification message at the top of the screen that shows you which are required plugins and which are recommended plugins for theme.
-
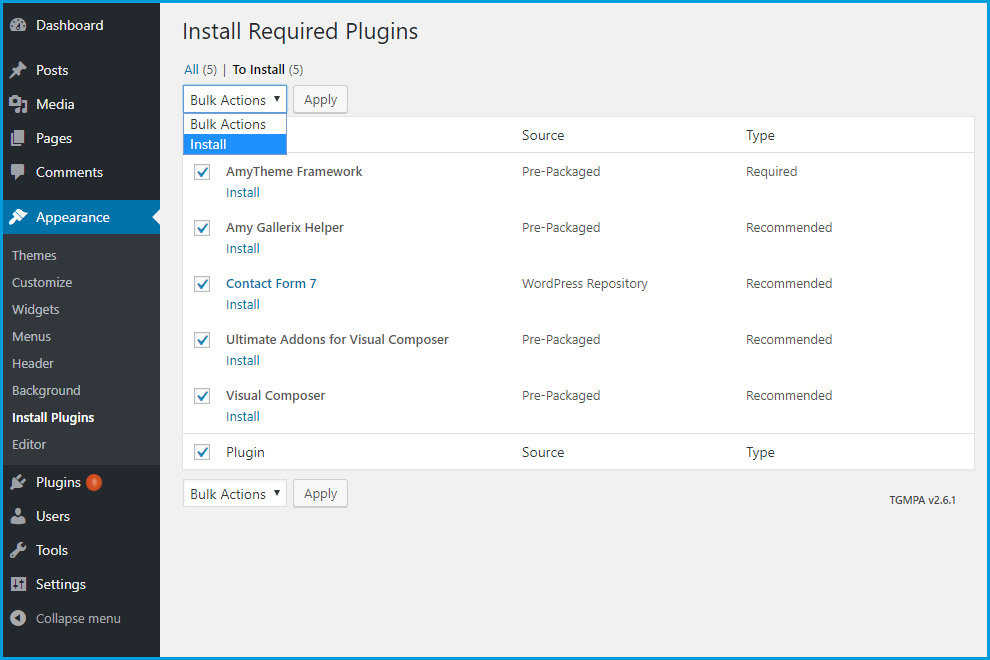
Step 2: Click on Begin Install Plugins link under the message to go to Plugin’s list in which you can install and activate the required and recommended plugins. Tick on the box for plugins you wish to install => Click on Bulk Action to see drop-down list => Install => Apply button
Important: Required plugins are compulsory plugins to make Amy Gallerix work.
-
Step 3: Wait for some seconds, after all of the plugin is installed, from Dashboard => Plugins, you will activate the plugins as you want.
Installing Demo Content
By One-Click Demo, you are easy to set up a site the same as Amy Gallerix's demo in seconds with all three home pages content
Important: Before installing demo, you need to make sure that Amy Gallerix theme and required plugins are installed and activated successfully
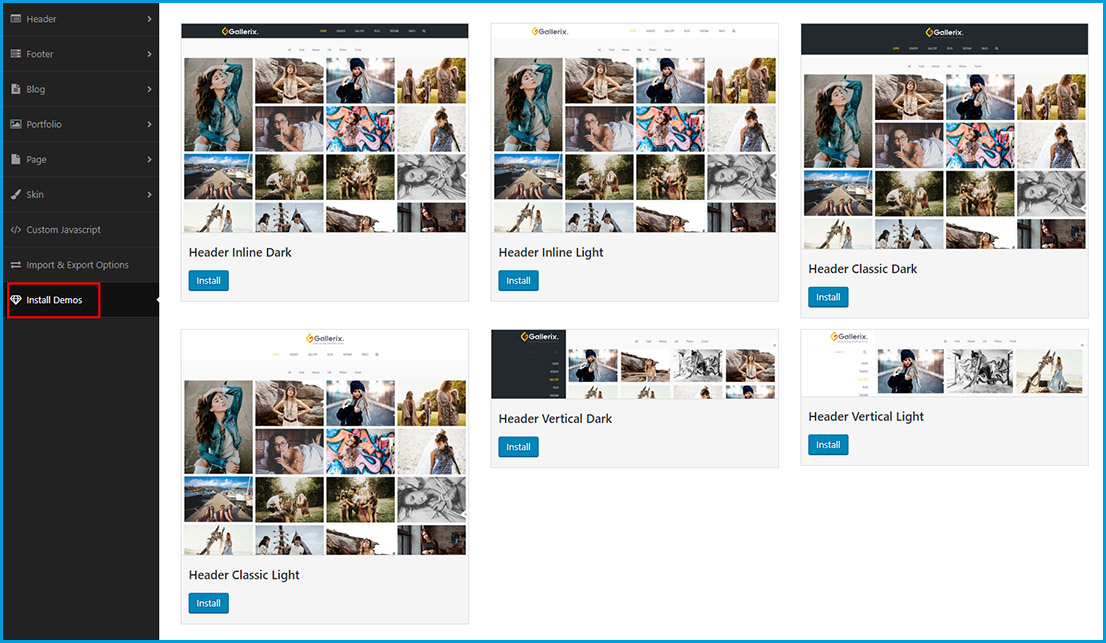
From Dashboard => Gallerix Theme => Install Demos => Click on Install button with the demo you want to import, a popup will appear to ask if you want to continue installing the demo content. Click on OK button if you want to continue. Please wait for some seconds, once the installing process is completed, you will see the message Demo's Installed
Blog Settings
This section allows you to set up the global settings for your blog page as well as your single blog pages.
From Dashboard => Gallerix Theme => Blog.
1. Blog & Post Archives Tab
From Dashboard => Gallerix Theme => Blog => click on Blog & Post Archives tab
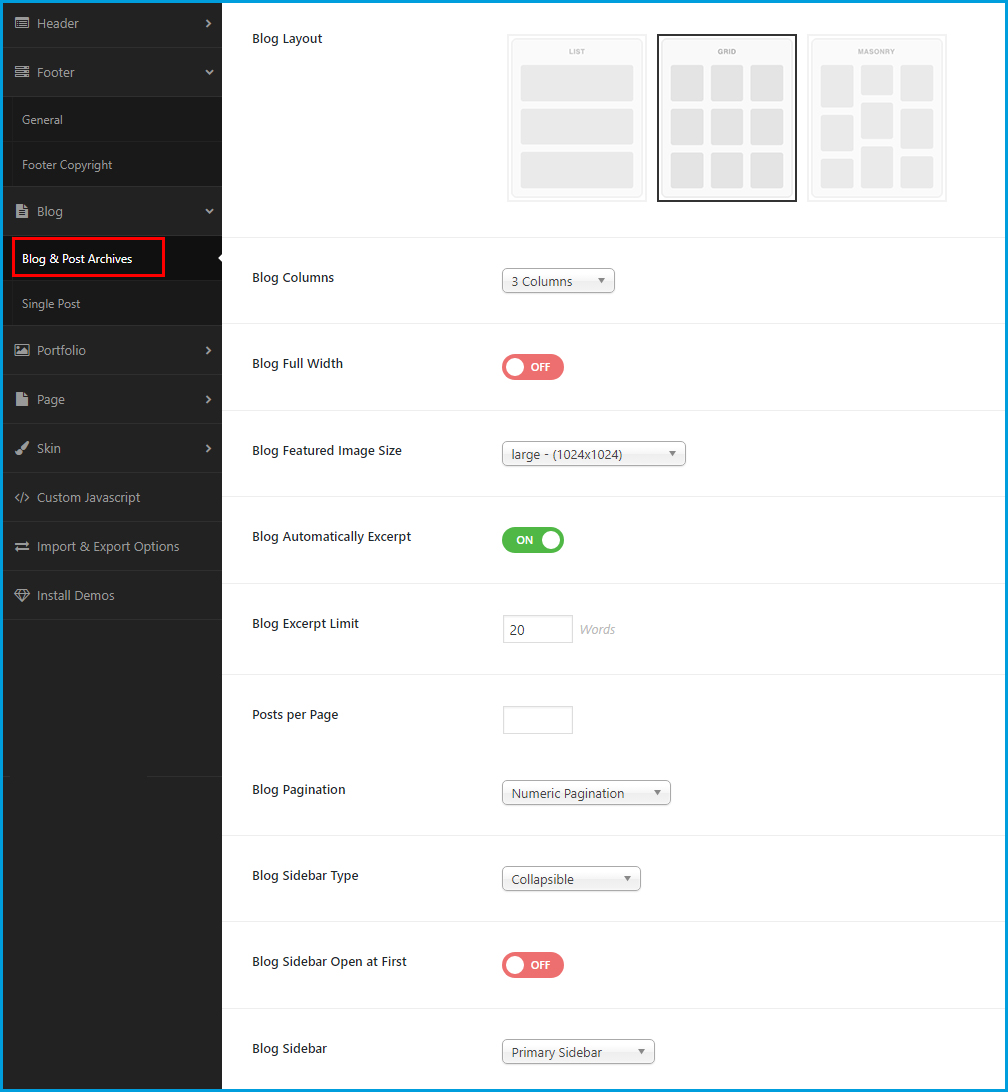
- » Blog Layout: Amy Gallerix theme offers you three layouts for your blog page (List layout, Grid layout and Masonry layout).
- » Blog Columns: Shows if Grid layout or Masonry layout is selected. Decide the number of columns for your blog page.
- » Blog Full Width: Shows if Grid layout and Masonry layout is selected.Select On/ Off to enable/ disable the full width blog page.
- » Blog Featured Image Size: You can decide the global size for featured image of the blog posts.
- » Blog Automatically Excerpt: Select On/ Off to show/ hide blog excerpt.
- » Blog Excerpt Limit: Enter the number of words will show at the post excerpt in the list style.
- » Post Per Page: Enter the number of posts you want to show per page.
- » Blog Pagination: Decide to use the default pagination or load more or hide pagination at your blog page.
- » Blog Sidebar Type: There are 5 displaying types of the blog sidebar: Slide On Top, Reveal, Collapsible, Always Open, No Sidebar.
- » Blog Sidebar Open At First: Shows if you choose Collapsible for Blog Sidebar Type option. Select On/ Off to decide open the blog sidebar first or not.
- » Blog Sidebar: Choose sidebar/ widget area from the list. These sidebars/ widget areas will be created at Widgets section.
2. Single Post tab
From Dashboard => Gallerix Theme => Blog => click on Single Post tab
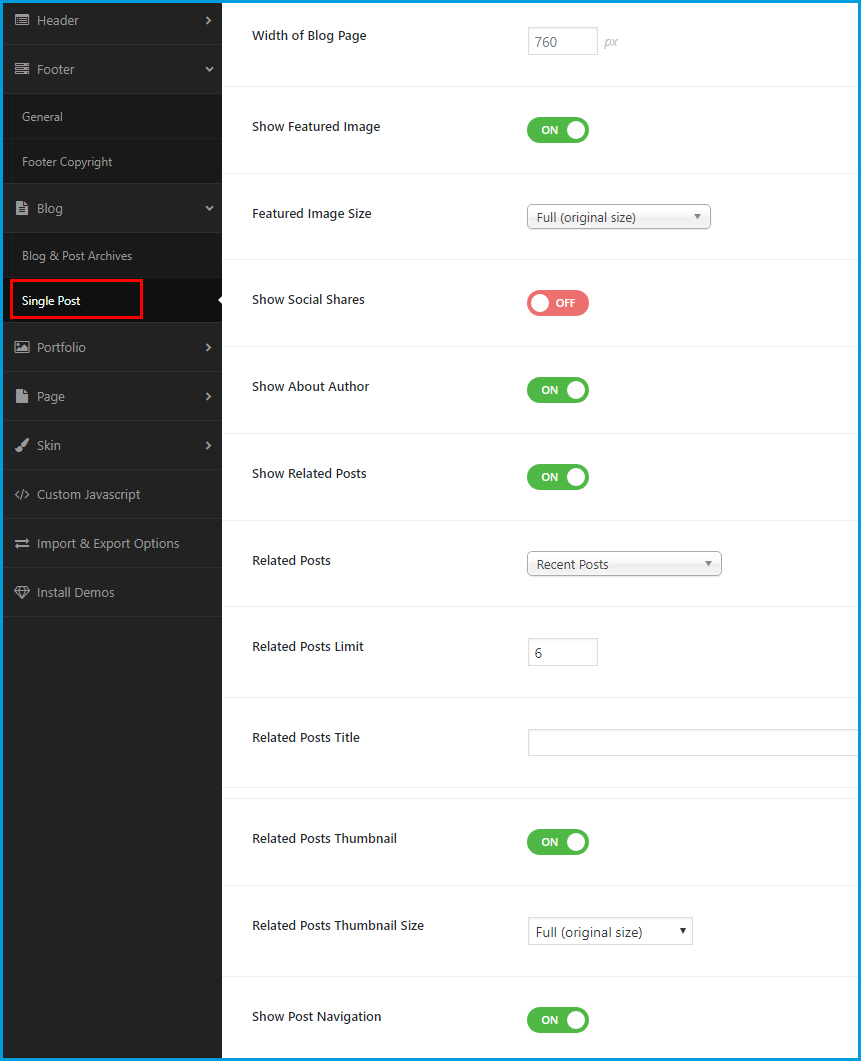
- » Width of the blog page: Able to change the width of the single blog page.
- » Show Featured Image: Select On/ Off to show/ hide featured image.
- » Show Social Share: Select On/ Off to show/ hide social icons (Facebook, Google Plus, Pinterest, Twitter) at the single blog page.
- » Show About Authors: Select On/ Off to show/ hide the “about author” section at the single blog page,
- » Show Related Posts: Select On/ Off to show/ hide the related posts at the single blog page.
- » Related Posts: Click on the arrow-down icon to select the related posts type (Recent Posts, Related Posts, Random Posts, Most Commented Post)
- » Related Posts Title: Enter the related post title
- » Related Post Thumbnail: Select On/ Off to show/ hide the related post thumbnail.
- » Related Post Thumbnail Size: Click on the arrow-down icon to choose the related post thumbnail size.
- » Blog Sidebar Open At First: Shows if you choose Collapsible for Blog Sidebar Type option. Select On/ Off to decide open the blog sidebar first or not.
- » Show Post Navigation: Select On/ Off to show/ hide the post navigation.
Click on Save button to save any your change.
Portfolio Settings
From Dashboard => Gallerix Theme => Portfolio, you can config the global settings for portfolio page and the single portfolio project page.
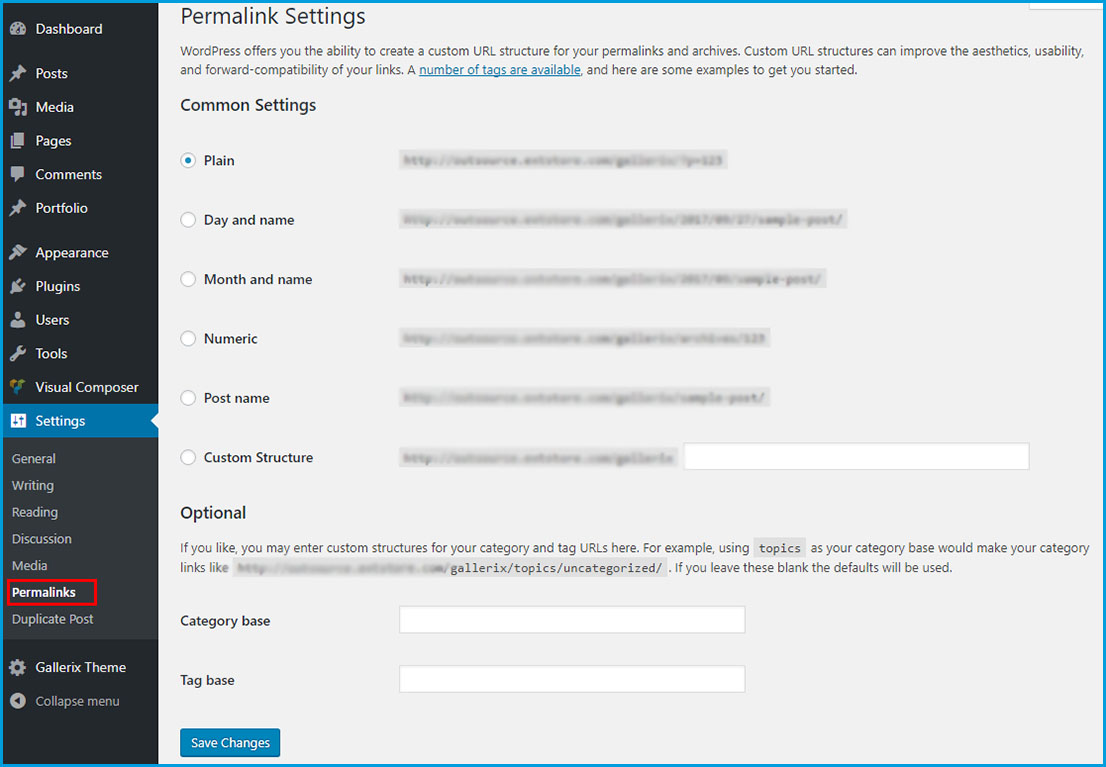
1. Permalink tab
From Dashboard => Gallerix Theme => Portfolio => click on Permalink tab, you can change the slug of the page single portfolio or page category portfolio.
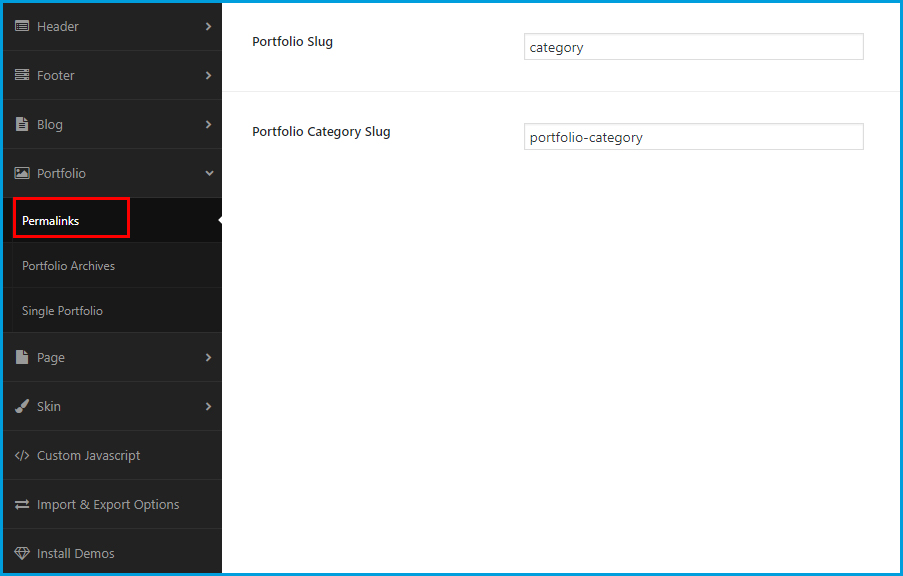
- » Portfolio Slug: Change the slug “portfolio” at the URL.
- » Portfolio Category Slug: Change the slug “portfolio-category” at the URL.
2. Portfolio Archives tab
From Dashboard => Gallerix Theme => Portfolio => click on Portfolio Archives tab, you will set the global settings for the portfolio category page.
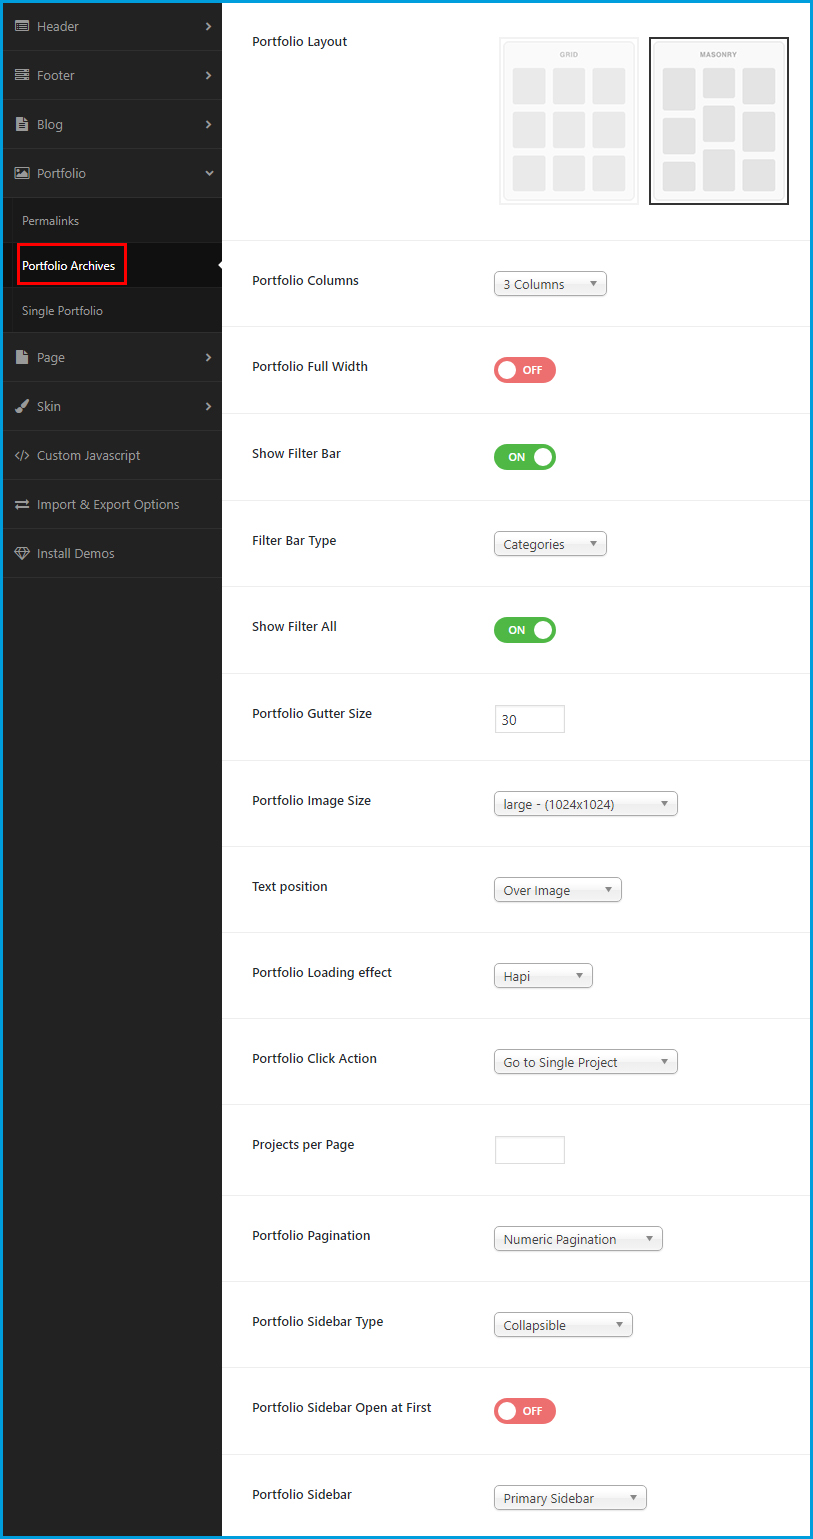
- » Portfolio Layout: Amy Gallerix supports two portfolio layouts (Grid layout and Masonry layout).
- » Portfolio Columns: Click on the arrow-down to choose the number columns for the portfolio page.
- » Portfolio Full Width: Select On/ Off to enable/ disable the full width portfolio page.
- » Portfolio Filter Bar: Select On/ Off to show/ hide the filter bar of the portfolio page.
- » Portfolio Filter Bar Type: Shows if you choose “On” for “Show Filter Bar” option. Decide to show the filter by tags or by categories.
- » Show Filter All: Shows if you choose “On” for “Show Filter Bar” option. Select On/ Off to decide to show/ hide “All” filter on the filter bar.
- » Portfolio Gutter Size: Enter the value of gutter between each single portfolio (unit by pixel).
- » Portfolio Image size: Click on the arrow-down icon to choose the image size for the project’s featured image.
- » Text Position: Decide the position of text (Under Image, Over Image or None if you don’t want to show text).
- » Portfolio Loading Effect: Click on the arrow-down icon to decide the loading effect for the portfolio page.
- » Portfolio Click Action: Click on the arrow-down icon to decide the portfolio click action (Go to Single Project, Gallery Popup, Load Projects with Ajax).
- » Project Per Page: Enter the number of projects per page.
- » Portfolio Pagination: Decide to show the numeric pagination/ load more or hide pagination.
- » Portfolio Sidebar Type: Amy Gallerix supports 5 types of the sidebar (Slide in on top, Reveal, Collapsible, Always Open, No Sidebar).
- » Portfolio Sidebar Open At First: Select On/ Off to decide open the blog sidebar first or not.
- » Portfolio Sidebar: Click on the arrow-down icon to choose a sidebar/ widget area from the list.
3. Single Portfolio tab
From Dashboard => Gallerix Theme => Portfolio => click on Single Portfolio tab, you will set the global settings for the single portfolio page.
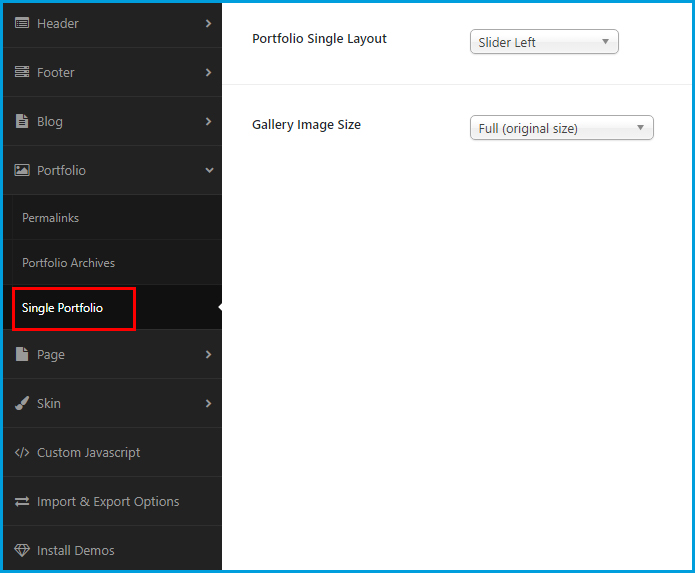
These are the global setting of the single portfolio page. However, you totally can change the settings in each single project page.
- » Portfolio Single Layout: Click on the arrow-down button to choose the layout for the single portfolio page (Slider Left, Slider Top, Images Bottom, Vetical Carousel)
- » Portfolio Single Columns: Shows if you choose Image Bottom at Portfolio Single Layout option. Decide the number of image columns in the single portfolio page.
- » Gallery Image Size: Choose the size for the gallery image.
Click on Save button to save any your change.
Page Settings
From Dashboard => Gallerix Theme => Page
1. General Tab
From Dashboard => Gallerix Theme => Page => click on General tab
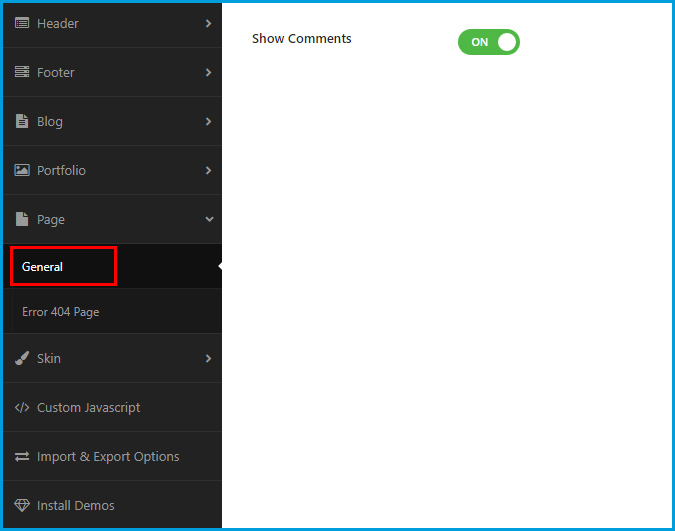
- » Show Comment: Select On/ Off to enable/ disable the Comment section on the page.
2. Error 404 Page setting tab
From Dashboard => Gallerix Theme => Page => click on Error 404 Page tab
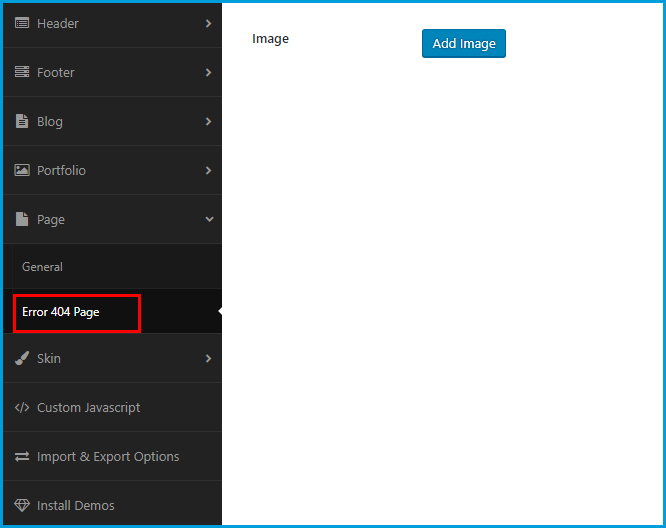
Click on Add Image button to upload image for the page error 404.
Click on Save button to save any your change.
Skin Settings
Skin section help you easy to change the general theme color, change the skin of header, footer, sidebar, portfolio and change the typography.
1. General
From Dashboard => Gallerix Theme => Skin => click on General tab
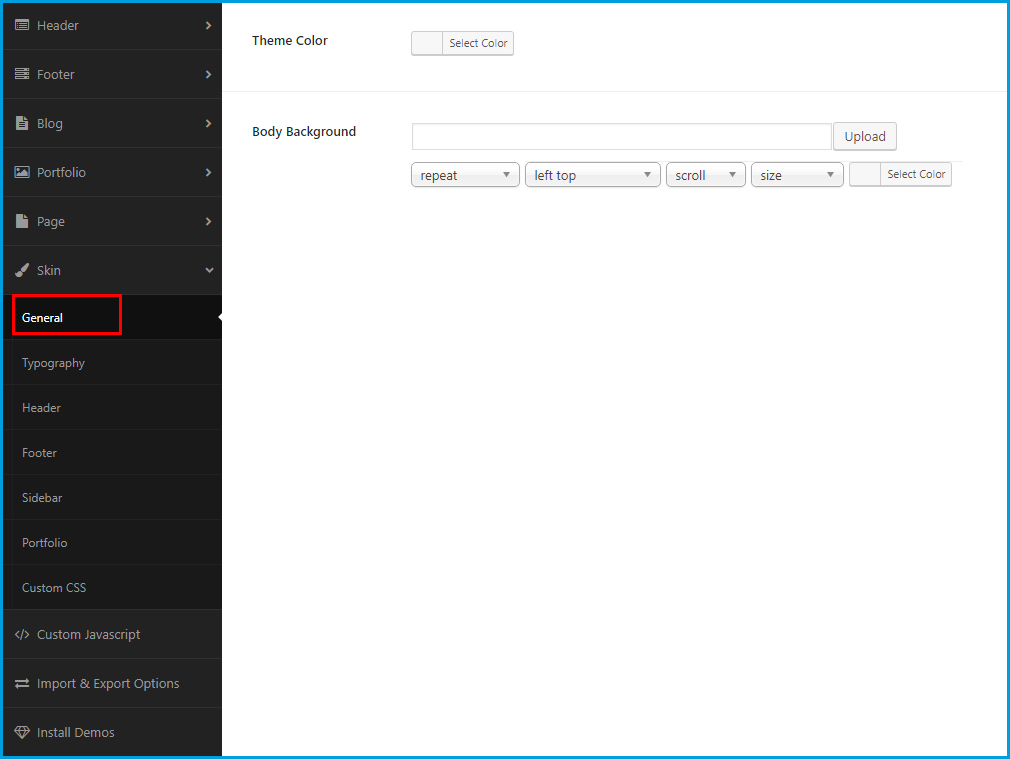
- » Theme Color: Click on Select Color button to change the general theme color.
- » Body Background: Click on Upload button to select a background image for the theme body. And click on Select Color button to decide the page body background color. If you upload a background image, you can change the image position, image scroll or fixed, and more,..
2. Typography tab
From Dashboard => Gallerix Theme => Skin => click on Typography tab => click on Add New Typography button to add new typography for new parts
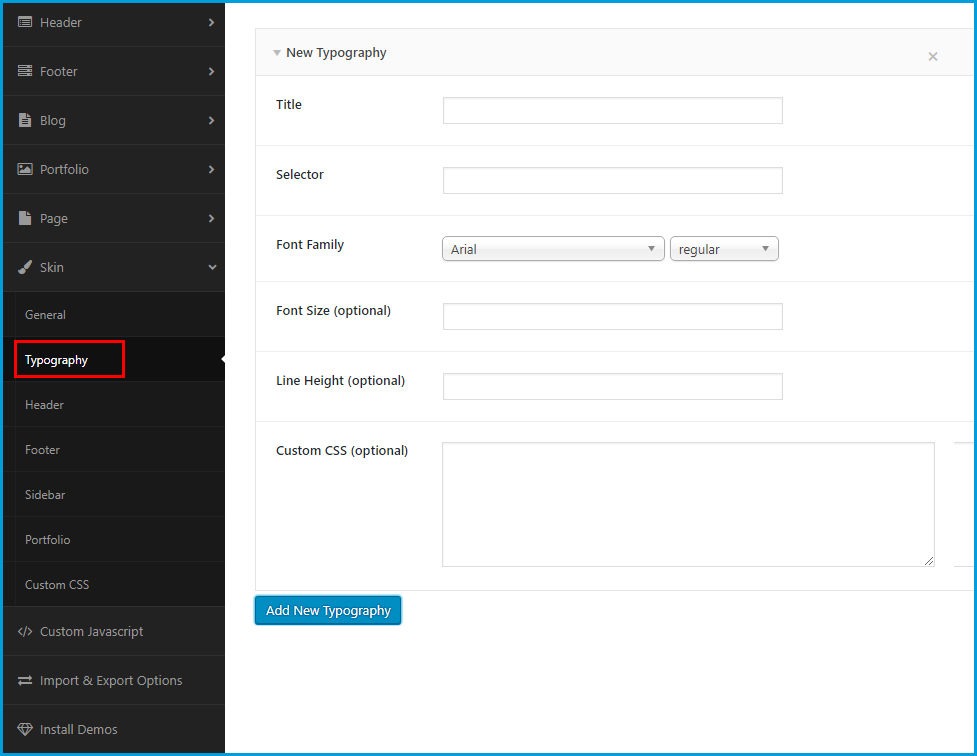
- » Title: Enter the title for the part you want to change typography. For example, enter "Menu Typography" to add typography for Menu.
- » Select: Enter class or ID of elements you want to change typography.
- » Font Family: Choose the font you want.
- » Font Size: Enter font size (by pixel), it's optional.
- » Line Height: Enter line height (by pixel), it's optional.
- » Custom CSS: Custom CSS for this element, it's optional.
3. Header tab
From Dashboard => Gallerix Theme => Skin => click on 3. Header tab.
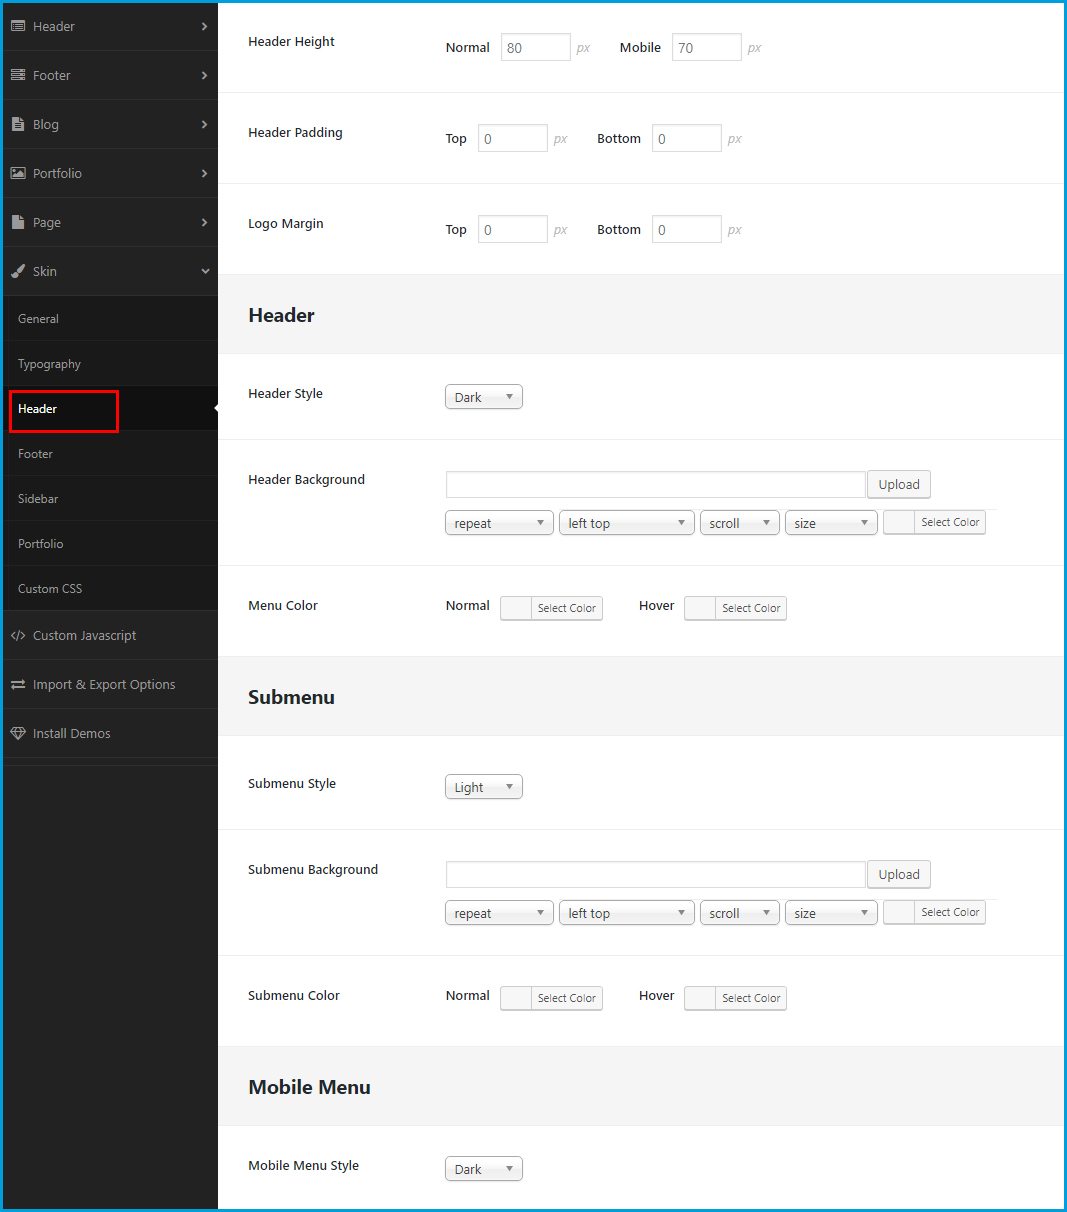
- » Header Height: Enter the value of the header height on the normal screen and on the mobile screen (unit by px).
- » Header Padding: Enter the value of header padding top and header padding bottom (unit by px)
- » Logo Margin: Enter the value of the logo margin top and the login margin bottom (unit by px)
- » Header Style: Decide to use the light header style or dark header style.
- » Header Background: Click on Upload button to select a background image for the theme header. And click on Select Color button to decide the theme header background color. If you upload a background image, you can change the image position, image scroll or fixed, and more,..
- » Menu Color: Change the normal color and hover color for the menu.
- » Submenu Style: Decide to use the light or dark submenu style.
- » Mobile Submenu Style: Decide to use the light or dark submenu style.
- » Submenu Background: Click on Upload button to select a background image for the submenu. And click on Select Color button to decide the submenu background color. If you upload a background image, you can change the image position, image scroll or fixed, and more,..
- » Submenu Color: Change the normal color and hover color for the submenu.
- » Mobile Menu Style: Decide to use the light menu or dark menu on the mobile.
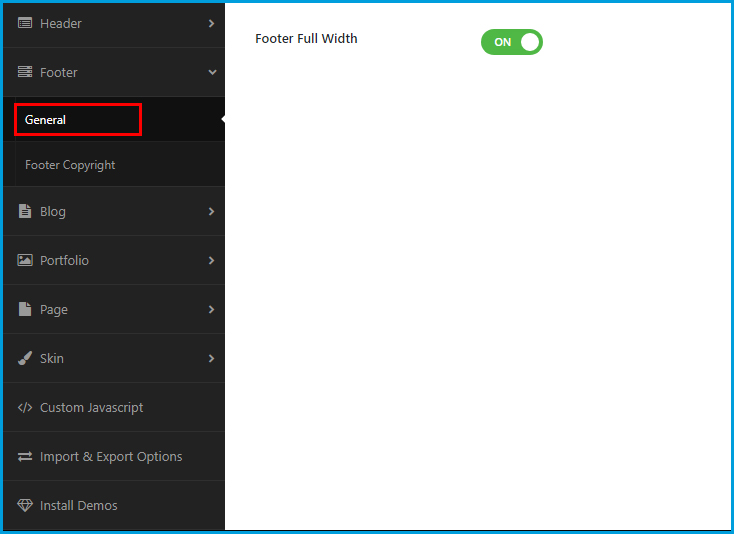
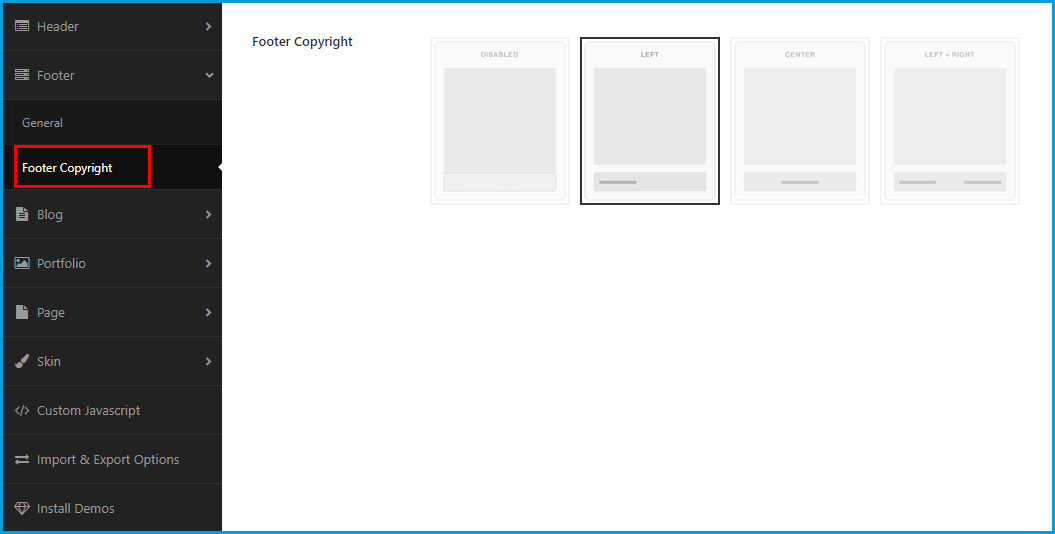
4. Footer Tab
From Dashboard => Gallerix Theme => Skin => click on Footer tab.
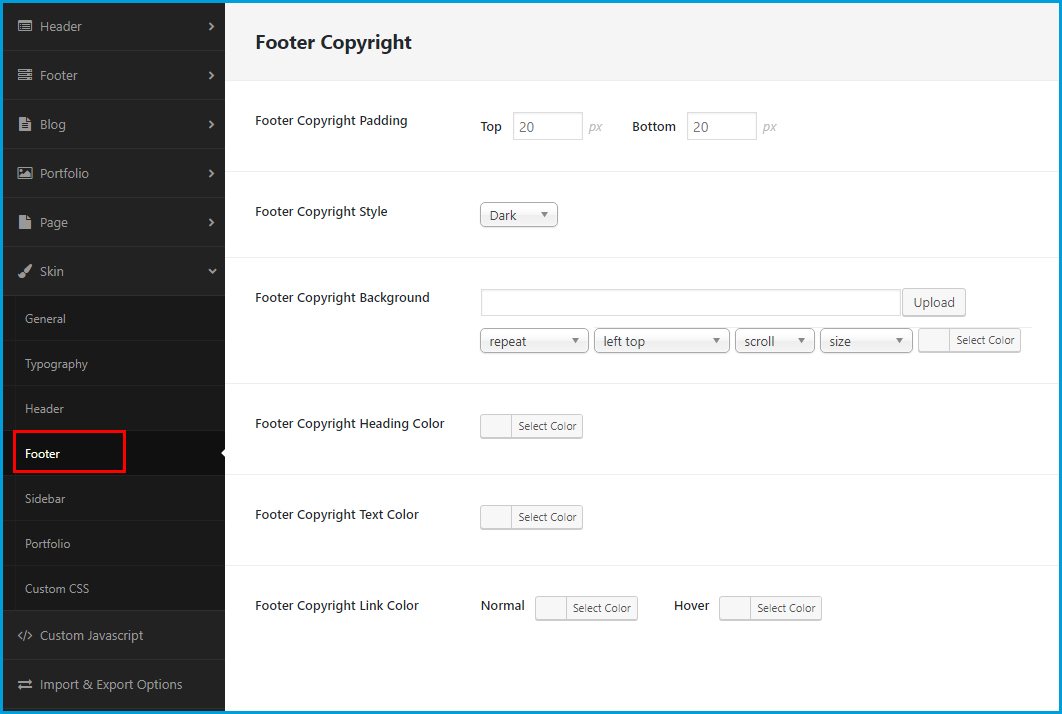
- » Footer Copyright Padding: Enter the value for the footer copyright padding top and the footer copyright padding bottom.
- » Footer Copyright Style: Decide to use the copyright dark style or the copyright light style.
- » Footer Copyright Background: Click on Upload button to select a background image for the copyright section. And click on Select Color button to decide the submenu background color. If you upload a background image, you can change the image position, image scroll or fixed, and more,..
- » Footer Copyright Heading Color: Click on Select Color button to change the color for the copyright heading.
- » Footer Copyright Text Color: Click on Select Color button to change the color for the copyright text.
- » Footer Copyright Link Color: Click on Select Colorbutton to change the color and the hover color for the copyright link.
5. Sidebar Tab
From Dashboard => Gallerix Theme => Skin => click on Sidebar tab.
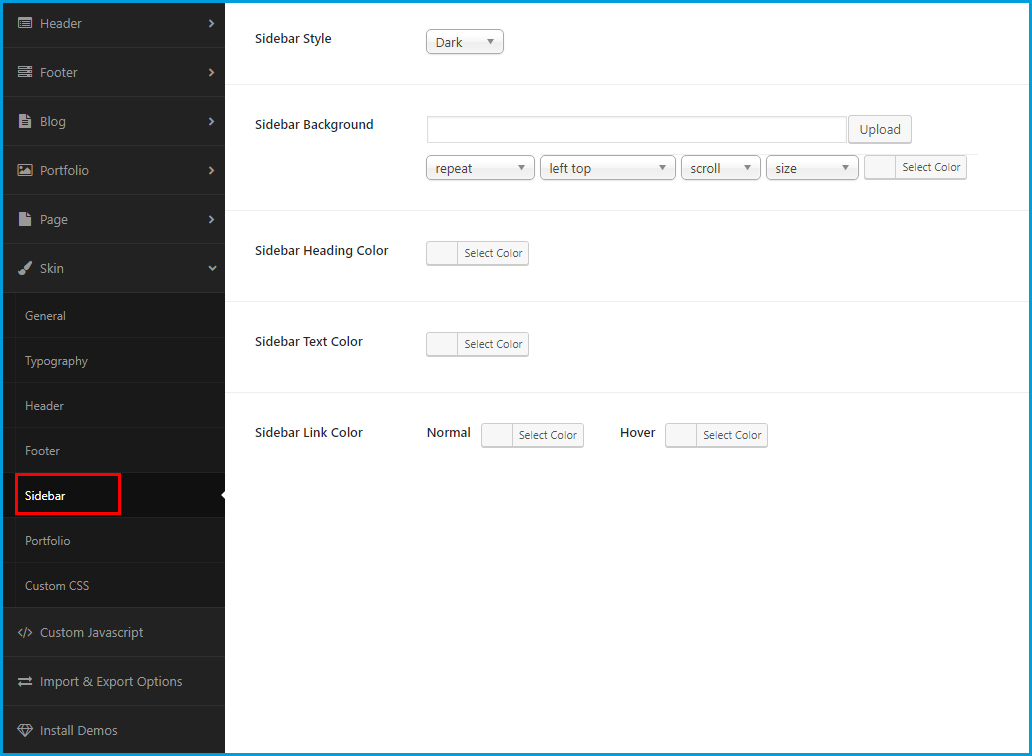
- » Sidebar Style: Decide to use the sidebar dark style or the sidebar light style.
- » Sidebar Background: Click on Upload button to select an background image for the page sidebar. And click on Select Color button to decide the sidebar background color. If you upload a background image, you can change the image position, image scroll or fixed, and more,..
- » Sidebar Heading Color: Click on Select Color button to change the color for the sidebar heading.
- » Sidebar Text Color: Click on Select Color button to change the color for the sidebar text.
- » Sidebar Link Color: Click on Select Color button to change the color and the hover color for the link on sidebar.
6. Portfolio Tab
From Dashboard => Gallerix Theme => Skin => click on Portfolio tab.
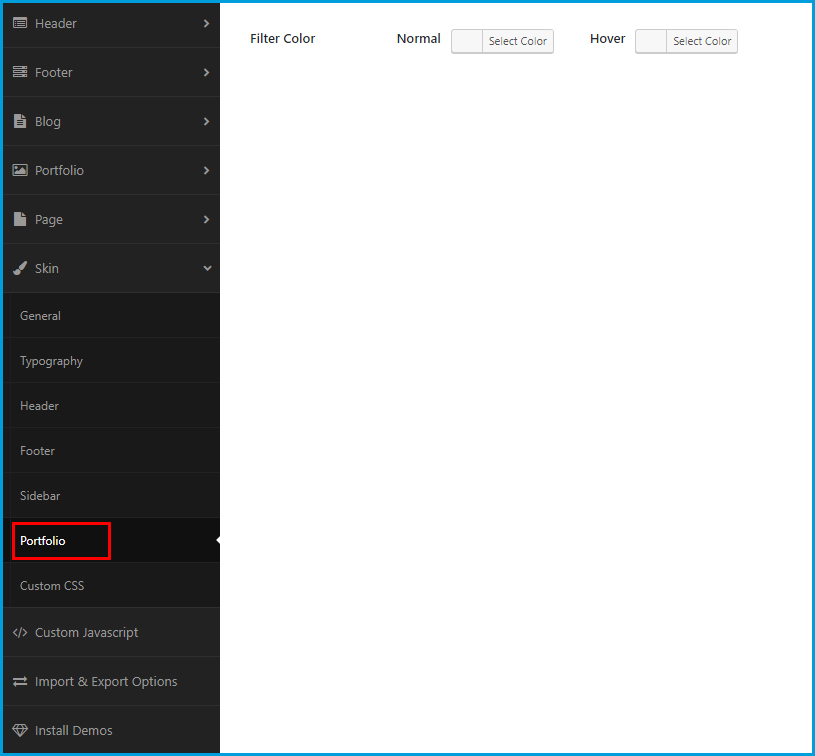
- » Filter Color: Click on Select Color button to change the color and the hover color for the portfolio filter.
7. Custom CSS Tab
From Dashboard => Gallerix Theme => Skin => click on Custom CSS tab.
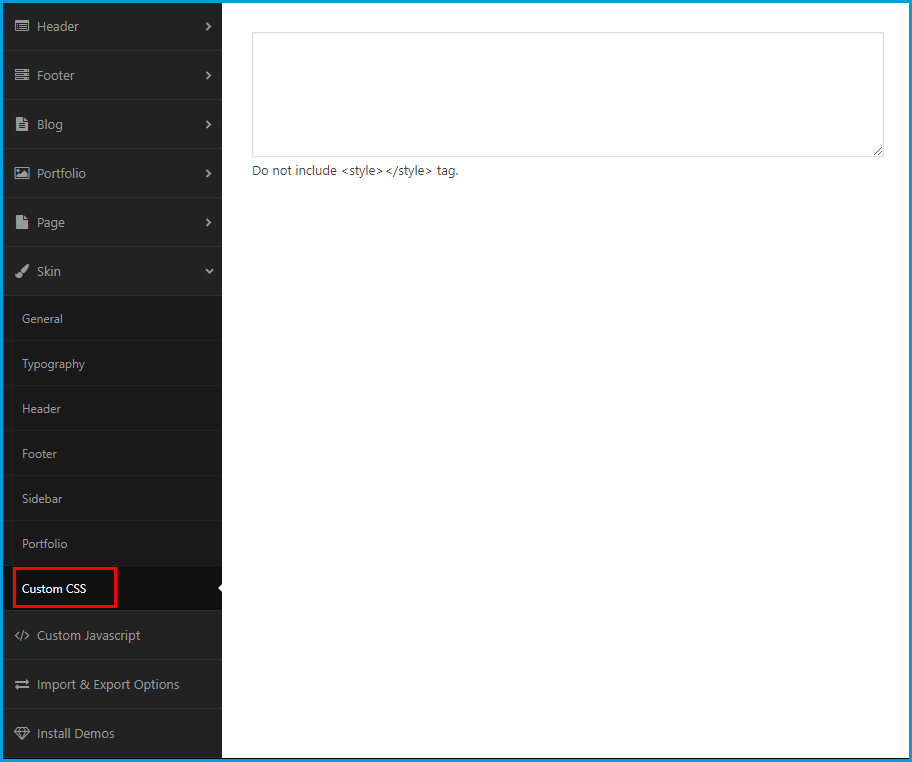
If you want more styles for the portfolio, you can add the custom CSS in this field
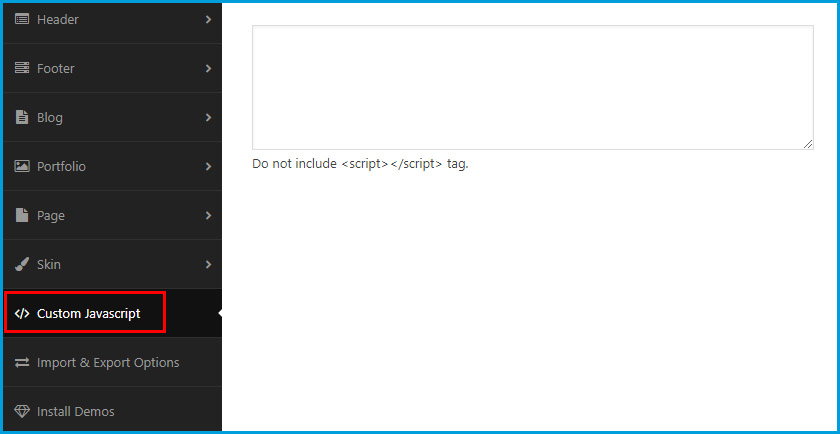
Custom Javascript
This options allows you custom javascript for your site. It is optional.
Install Demos
This option allows you to install or uninstall demo content by some clicks.
From Dashboard => Gallerix Theme => Install Demos.
You can visit Demo Installation section to get the detail guide for this part.
How To
This section guildes all the things you need to create for your Gallerix websites. Here you will learn how to create new posts, single portfolio projects and how to set up a homepage.
Portfolio Settings
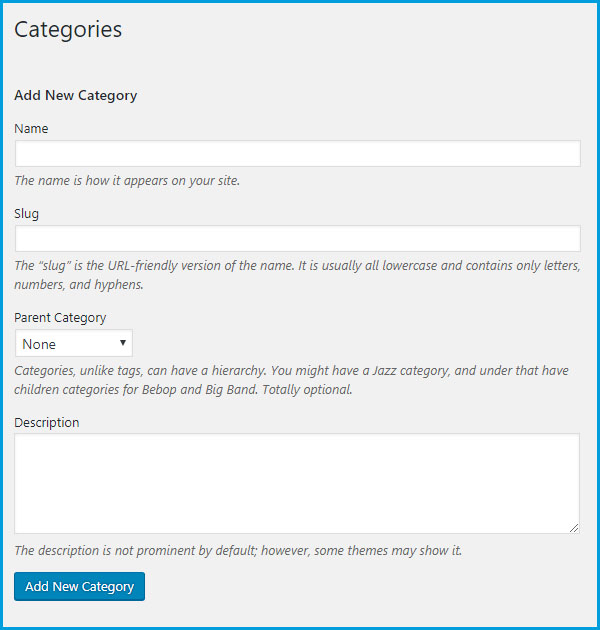
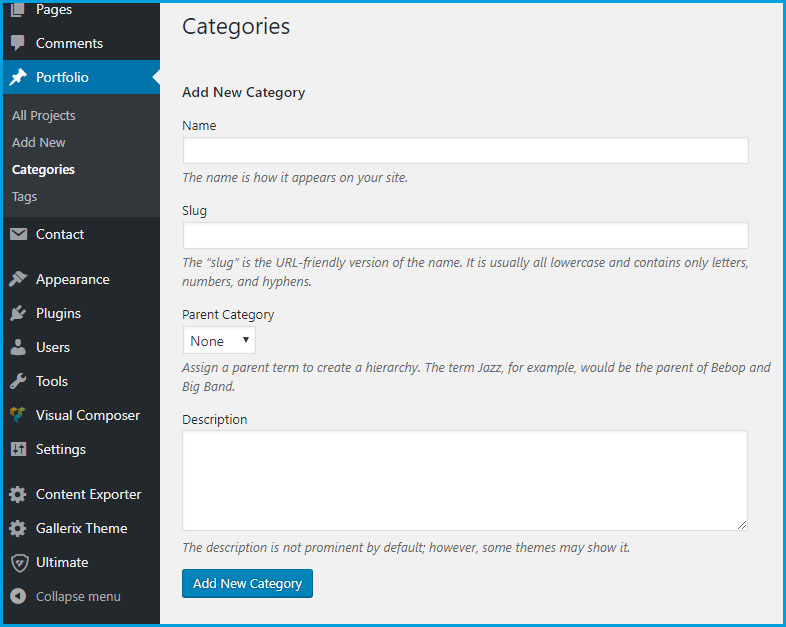
1. How to add new project category
From Dashboard => Portfolios => Categories => Enter the category’s name.
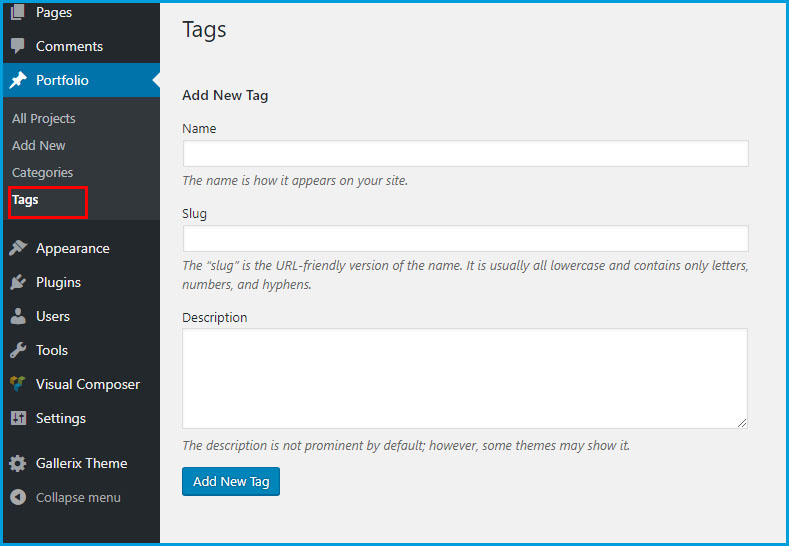
2. How to add new tag
From Dashboard => Portfolios => Tag => Enter the tag’s name then click on Add New Tag button. You also can add the new tags while you create a new project.
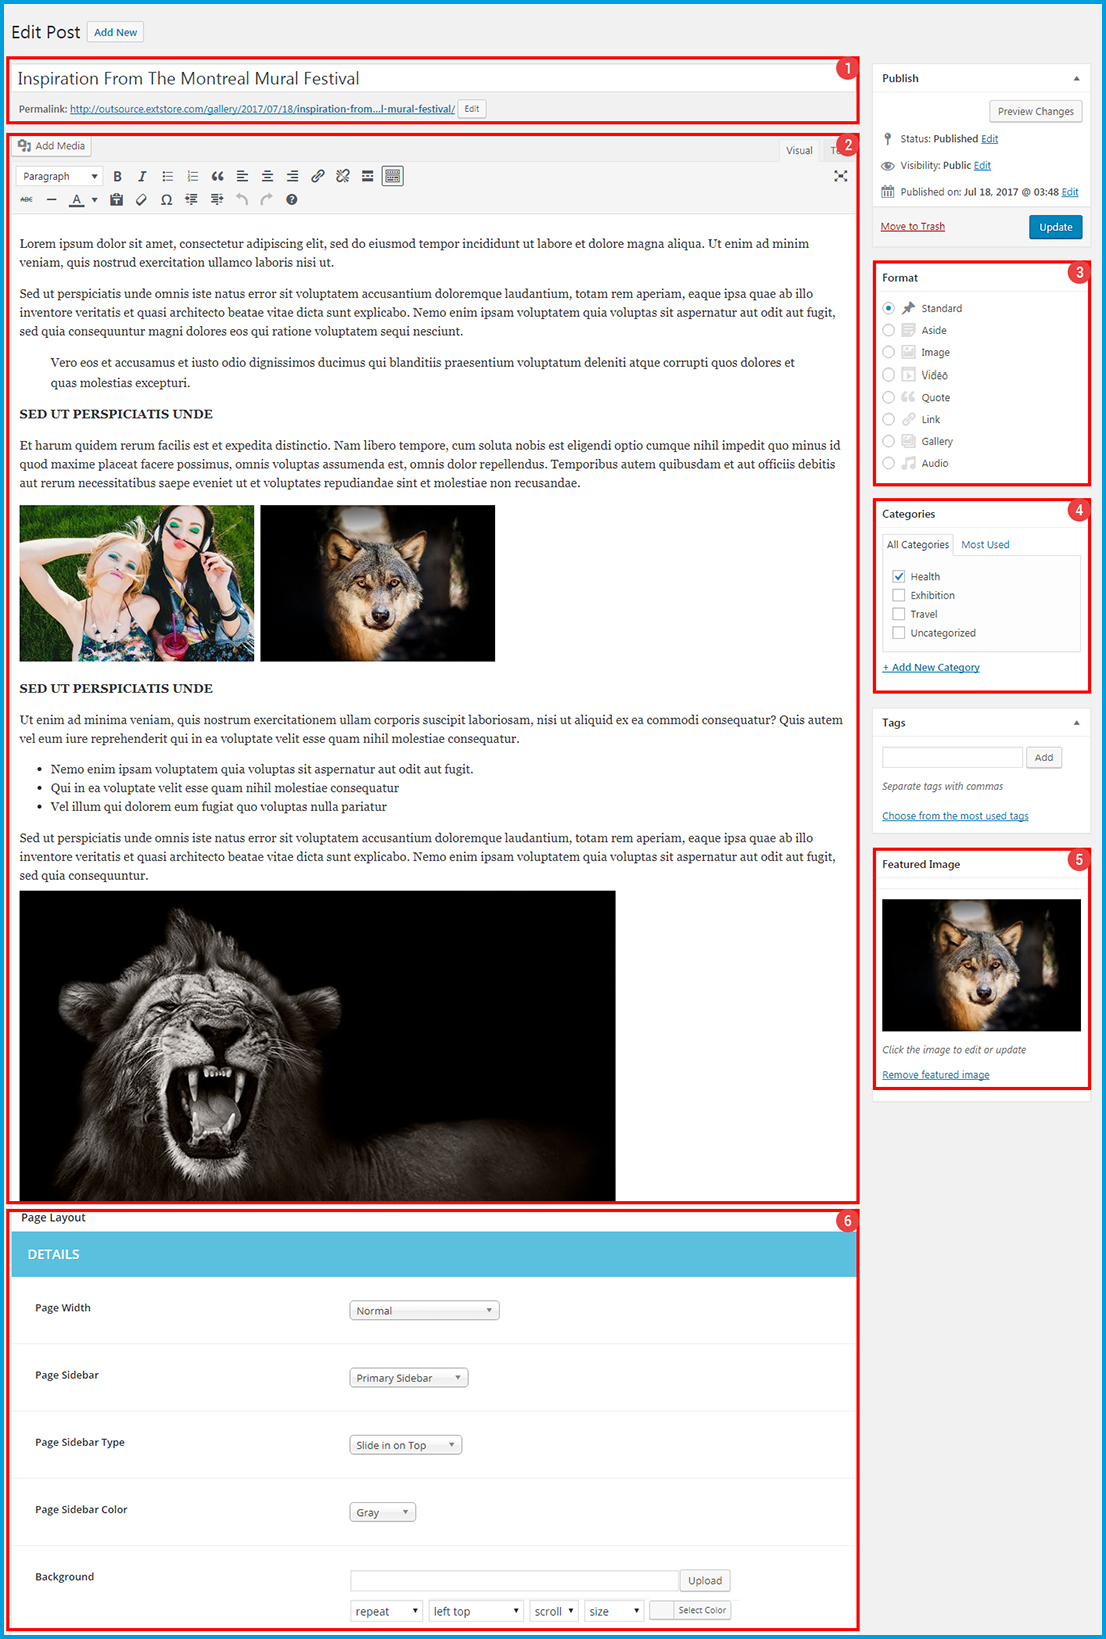
3. How to add new project
From Dashboard => Portfolios => Add New
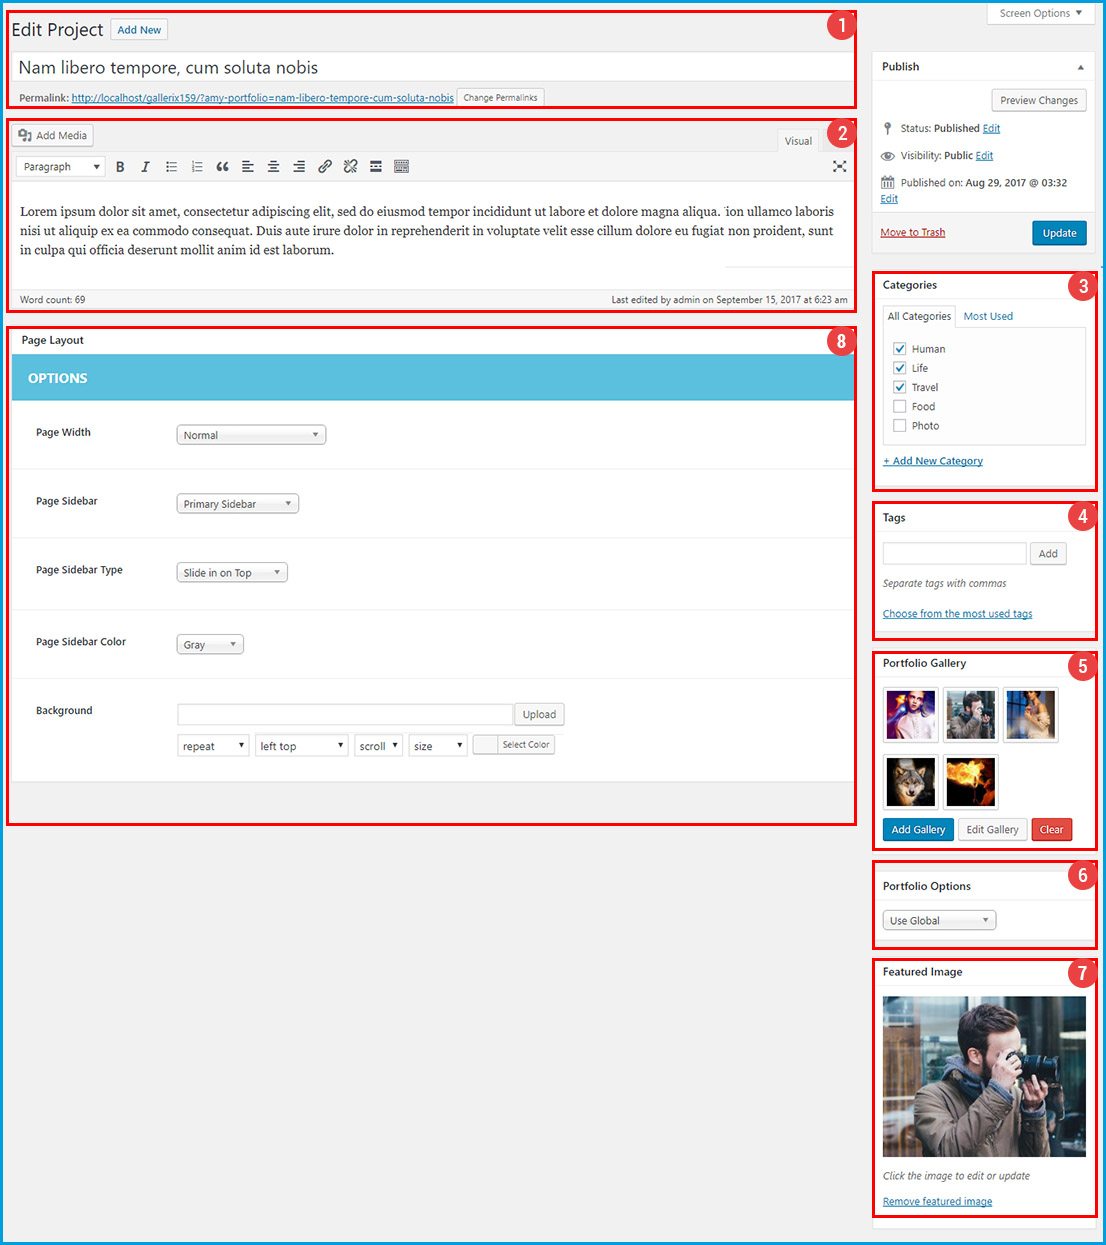
 Enter the title for the project and edit the project URL.
 Enter the project description.
 Choose the categories for your project. You can select multiple categories for each project.
 Enter the tag for the project.
 Upload and edit the project gallery
 Decide the single project layout (Slider Left, Slider Top, Image Bottom, Horizontal or use the global setting).
 Set image thumbnail for your project.
 Page layout
- » Page Width: Decide to use the normal page width, the page full width or the page full width with no padding.
- » Page Sidebar: Choose a sidebar/ widget area from the list. These sidebar/ widget area will be created at Widgets section.
- » Page Sidebar Type: There are 4 displaying types of the blog sidebar: Slide On Top, Reveal, Collapsible, Always Open.
- » Page Sidebar Color: There are two colors supporting for the page sidebar (white or gark color).
- » Background: Click on Upload button to select a background image. And click on Select Color button to decide the page background color. If you upload a background image, you can change the image position, image scroll or fixed, and more,..
After all, click on Publish button.
How To Create Homepage
By default, WordPress sets blog page as a home page for your website. Almost of time, it is not what you want, so in this guide, you can learn how to create and set up a special homepage for your site.
Build up a page by Visual Composer
From Dashboard => Pages => Add New
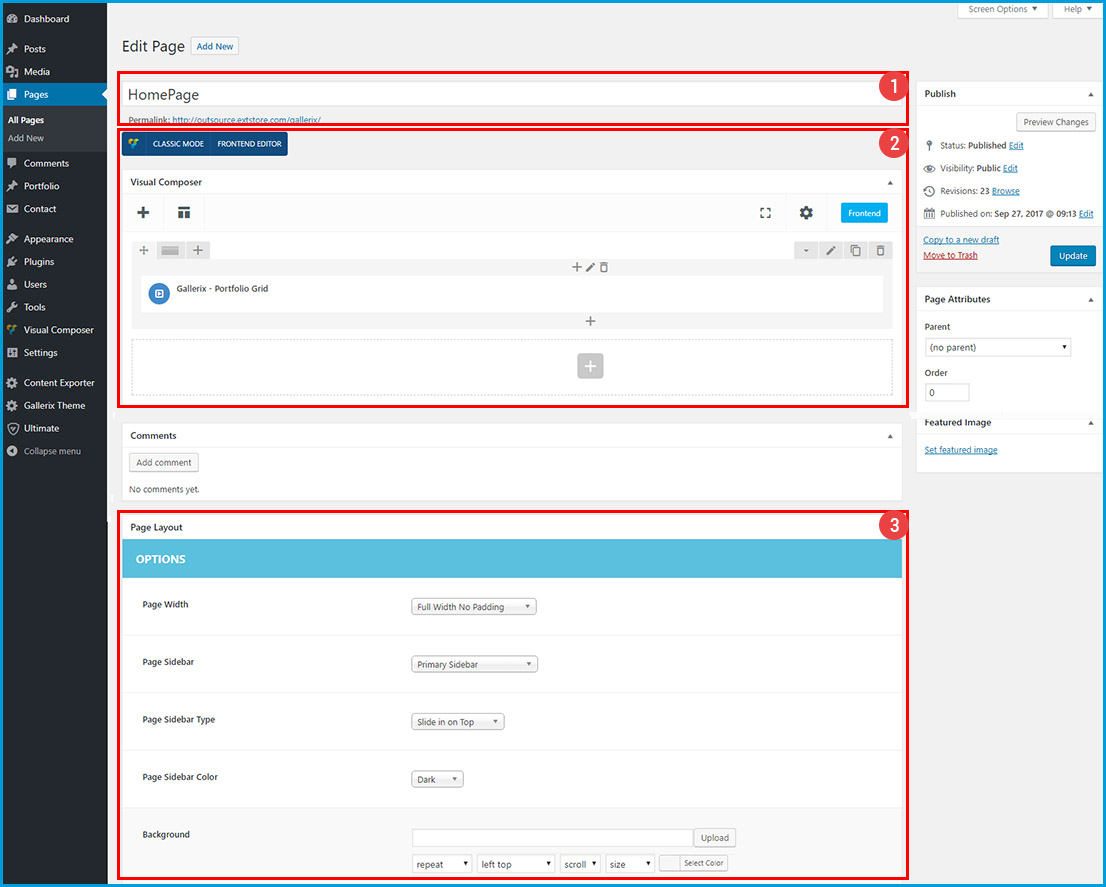
- Enter the page title and edit the page URL.
- Build up homepage content by using Visual Composer elements and Custom Gallerix Shortcodes.
- Page layout
- » Page Width: Decide to use the normal page width, the page full width or the page full width with no padding.
- » Page Sidebar: Choose a sidebar/ widget area from the list. These sidebar/ widget area will be created at Widgets section.
- » Page Sidebar Type: There are 4 displaying types of the blog sidebar: Slide On Top, Reveal, Collapsible, Always Open.
- » Page Sidebar Color: There are two colors supporting for the page sidebar (white or gark color).
- » Background: Click on Upload button to select a background image. And click on Select Color button to decide the page background color. If you upload a background image, you can change the image position, image scroll or fixed, and more,..
After all, click on Publish button
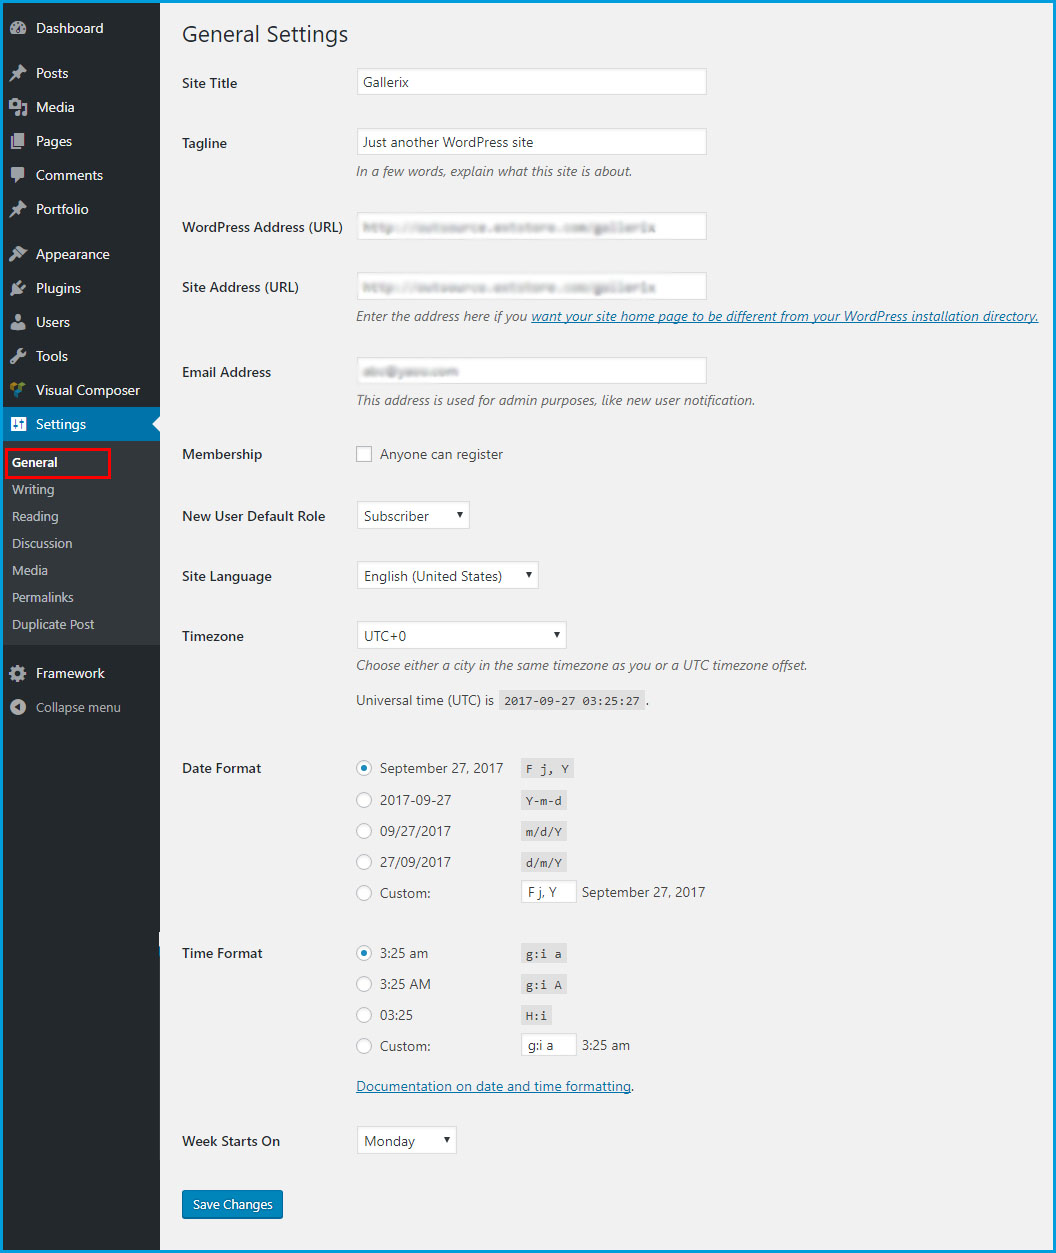
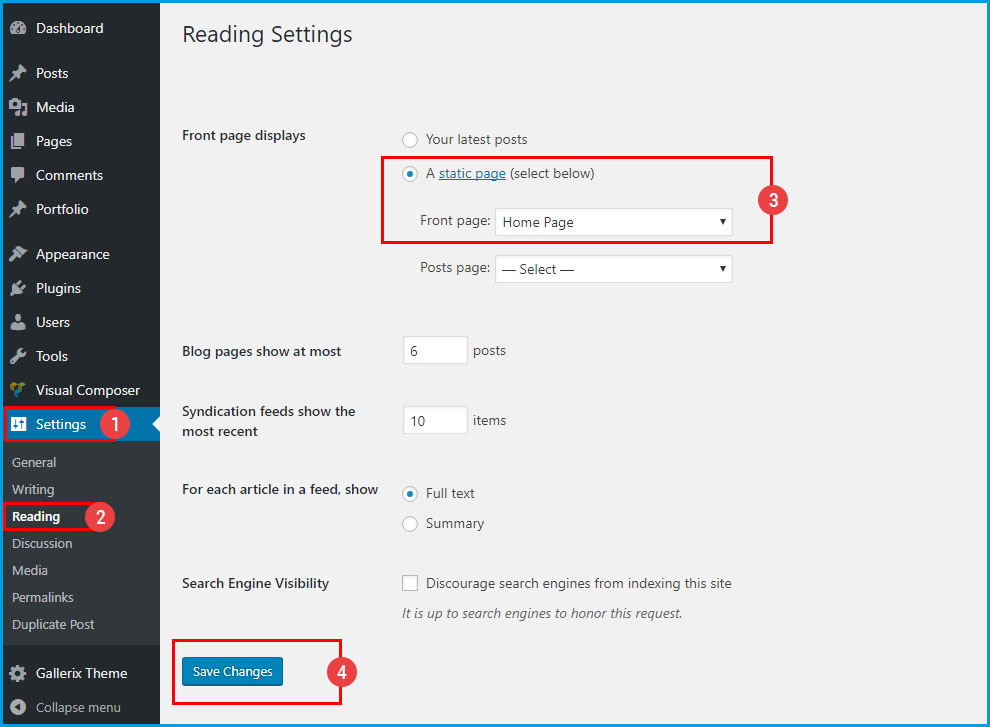
Set up Front Page
From Dashboard => Settings => Reading, you can set homepage by following the steps of the screenshot below.
Gallerix Post Grid
Gallerix Post Grid allows you to display your blog posts in Grid or List or Masonry layout. You can insert a slider in your blog page.
1. Genereal Settings

2. Layout Settings
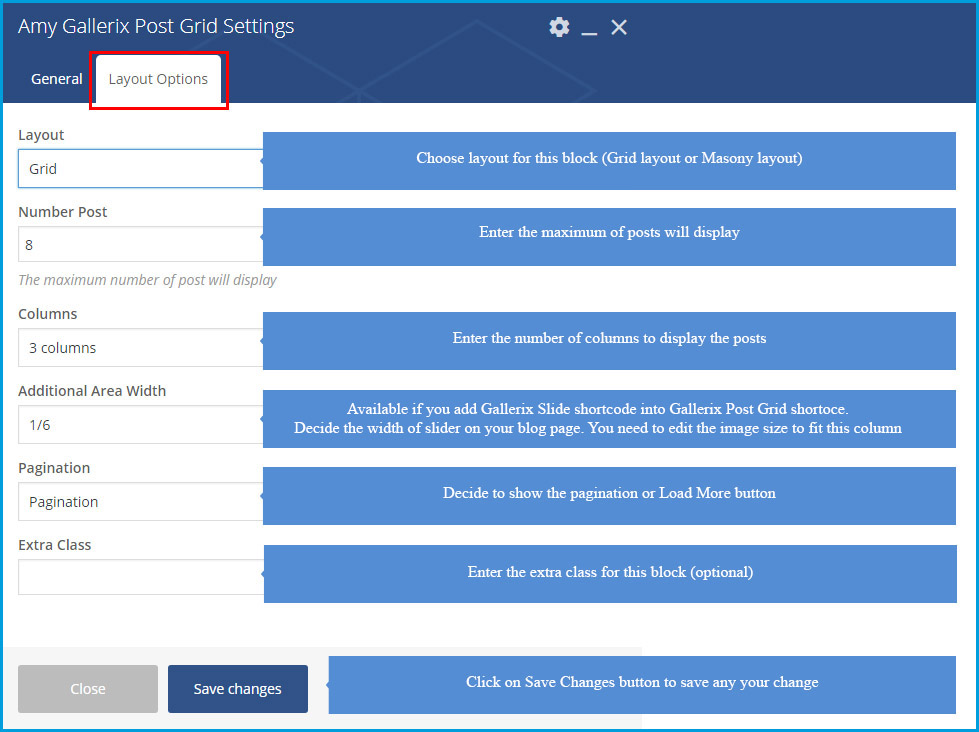
Please note, you can add Gallerix Slide shortcode into the Post Grid block by click on Plus button
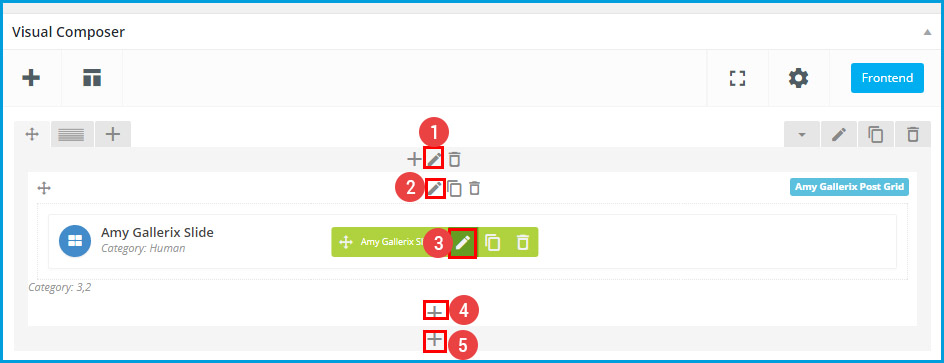
- Click on this “Edit” button to edit the column.
- Click on this “Edit” button to edit Amy gallerix Post Grid shortcode settings.
- Click on this “Edit” button to edit Amy gallerix Slide shortcode settings.
- Click on this “Plus” button to add Amy gallerix Slide shortcode as an item of Amy gallerix Post Grid shortcode.
- Click on this “Plus” button to add extra shortcode for this columns.
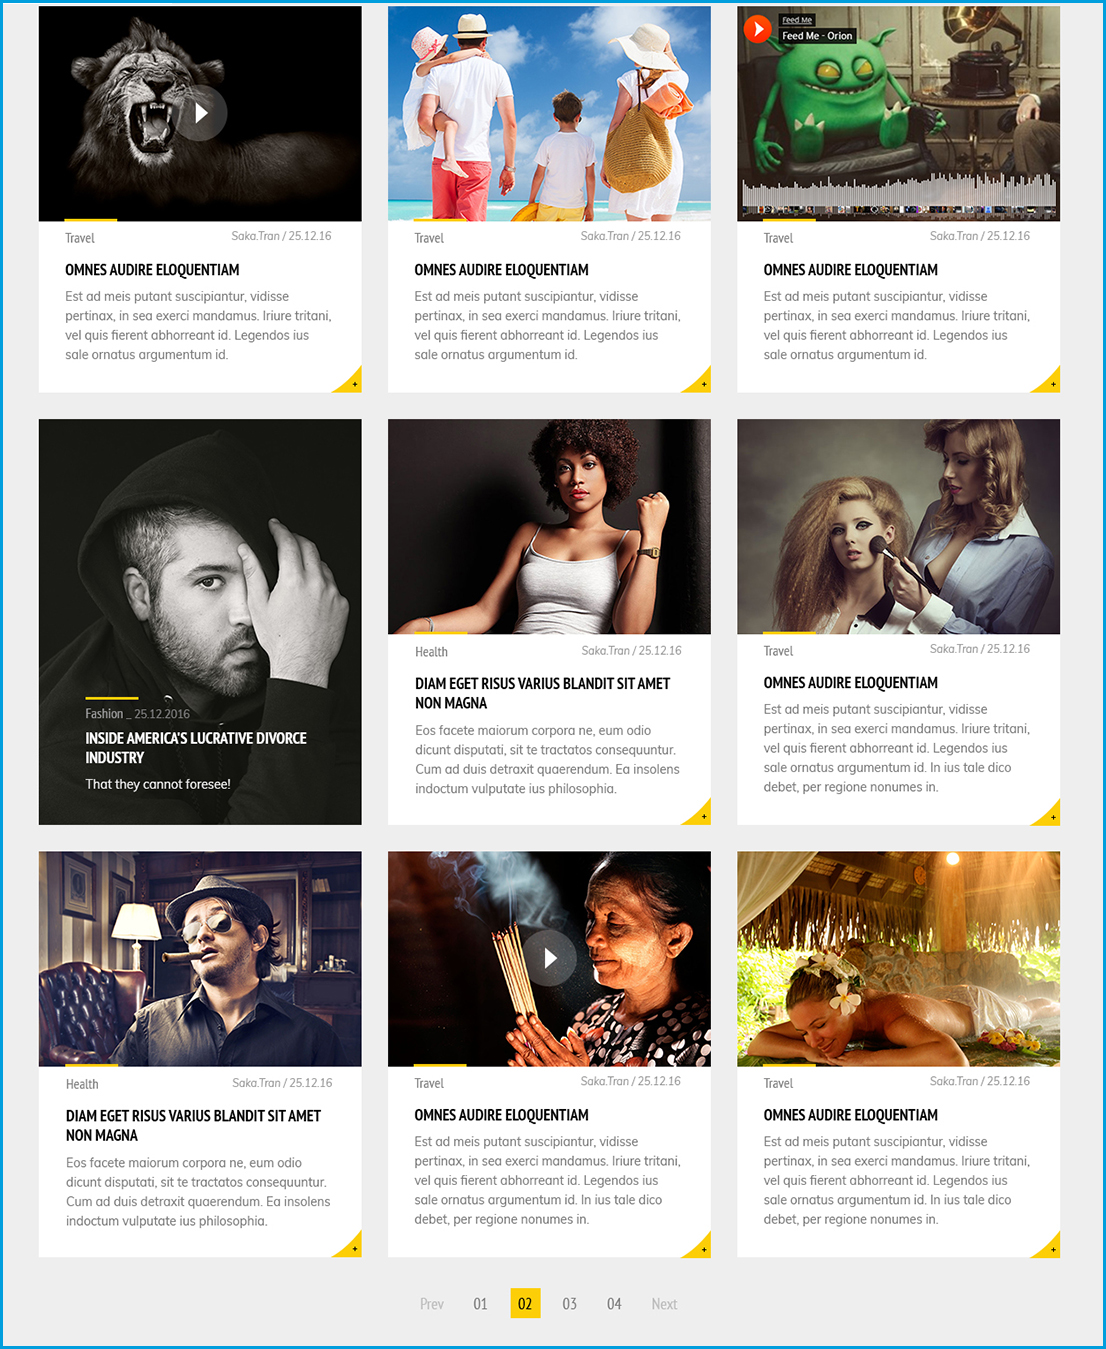
Grid Layout you can see
Masonry Layout you can see
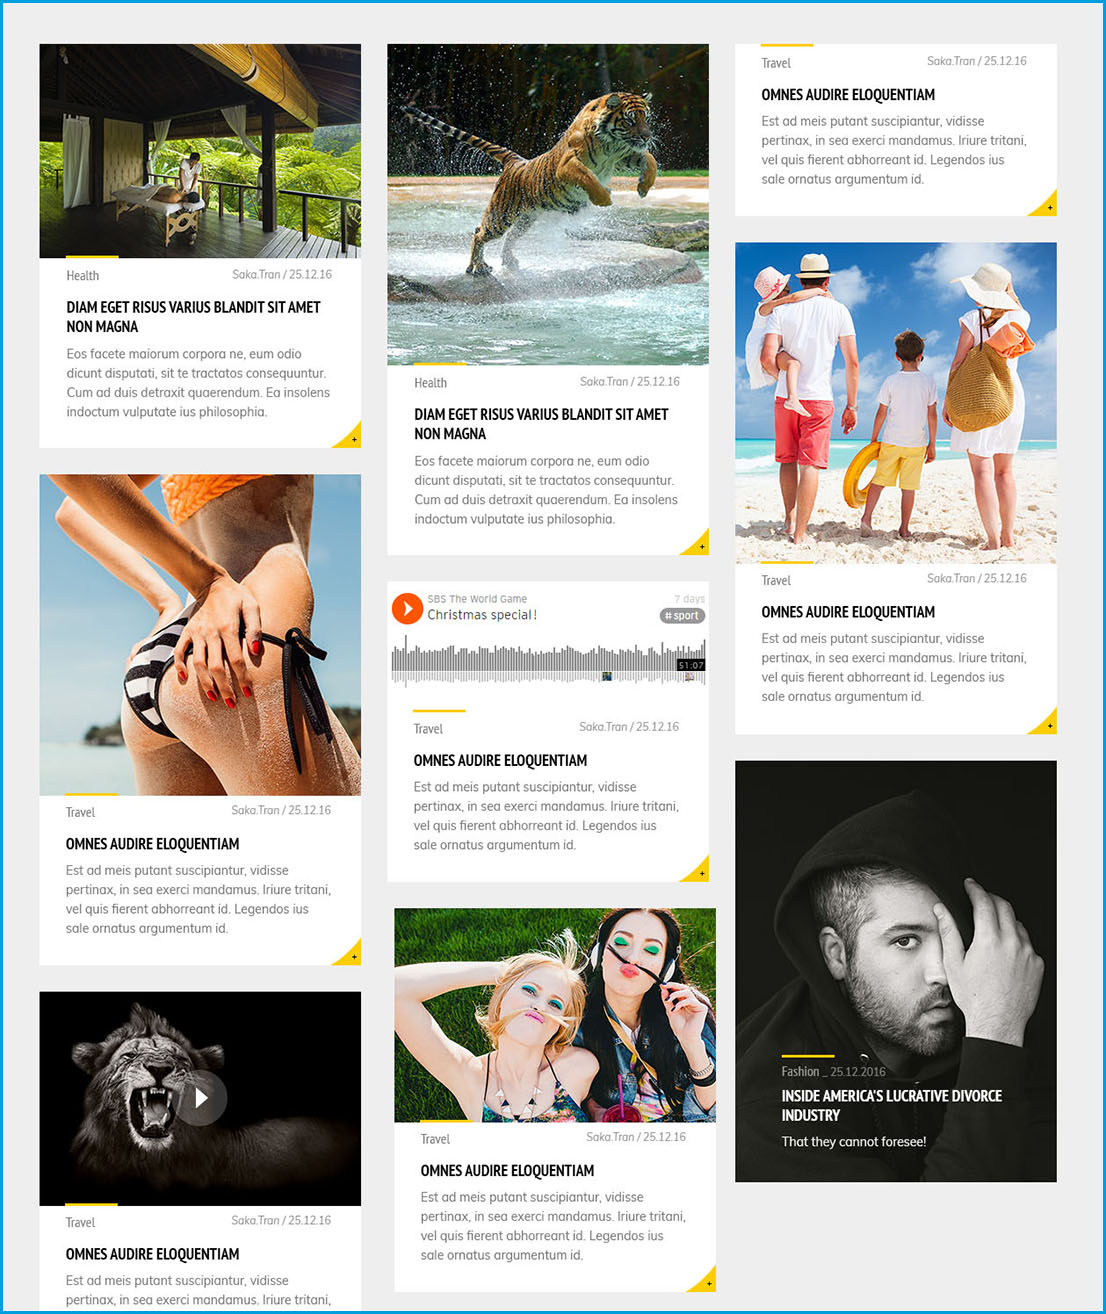
Masonry Layout with slider, you can see
Gallerix Slide
Gallerix Slide help you show the posts on the slides.
At the backend you can see
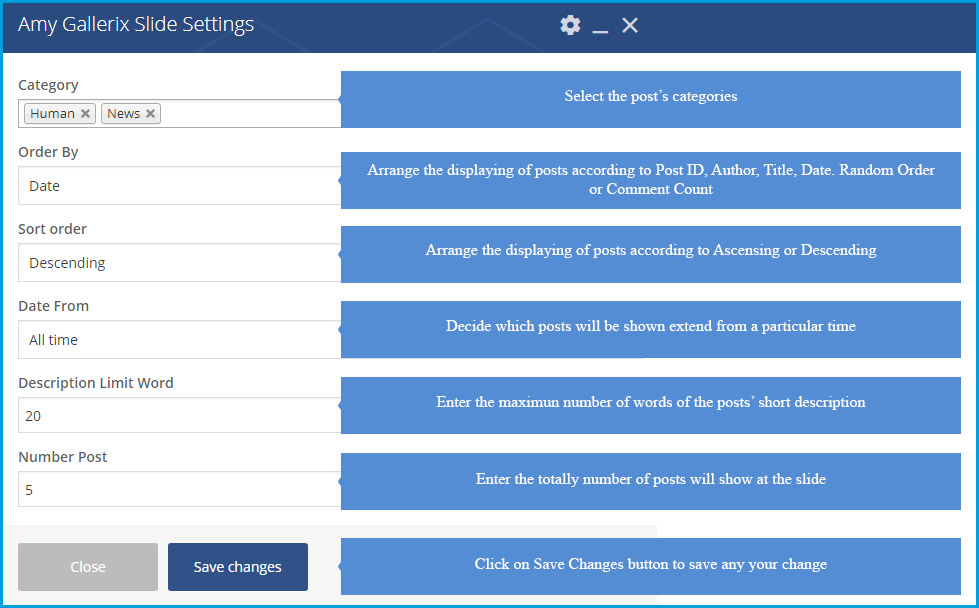
On the frontend you can see
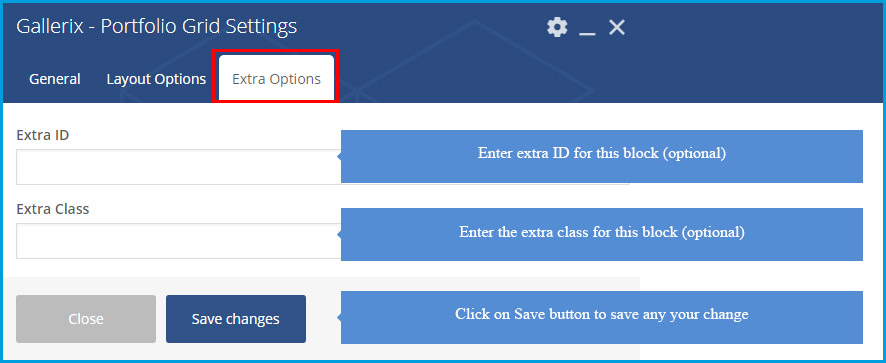
Gallerix - Portfolio Grid
Gallerix - Portfolio Grid shortcode will help you build up stunning portfolio pages with awesome interface and active effect.
1. Genereal Settings

2. Layout Settings
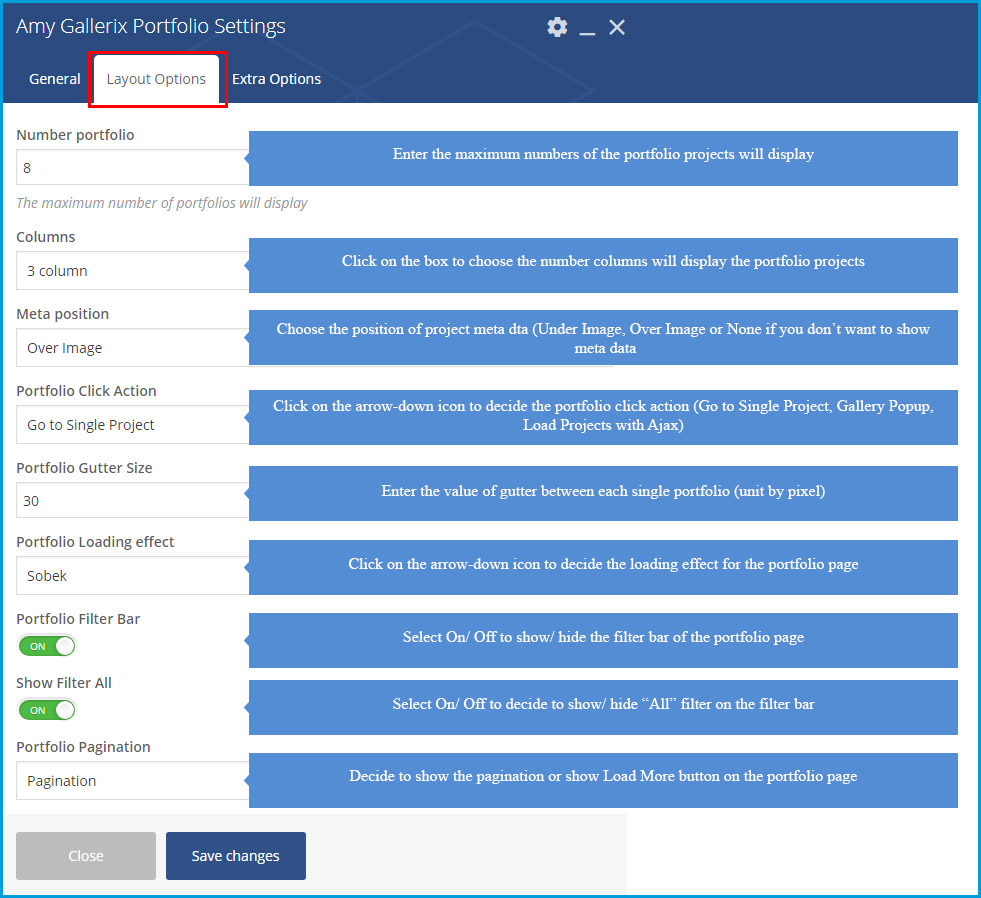
3. Extra Options
On the frontend you can see

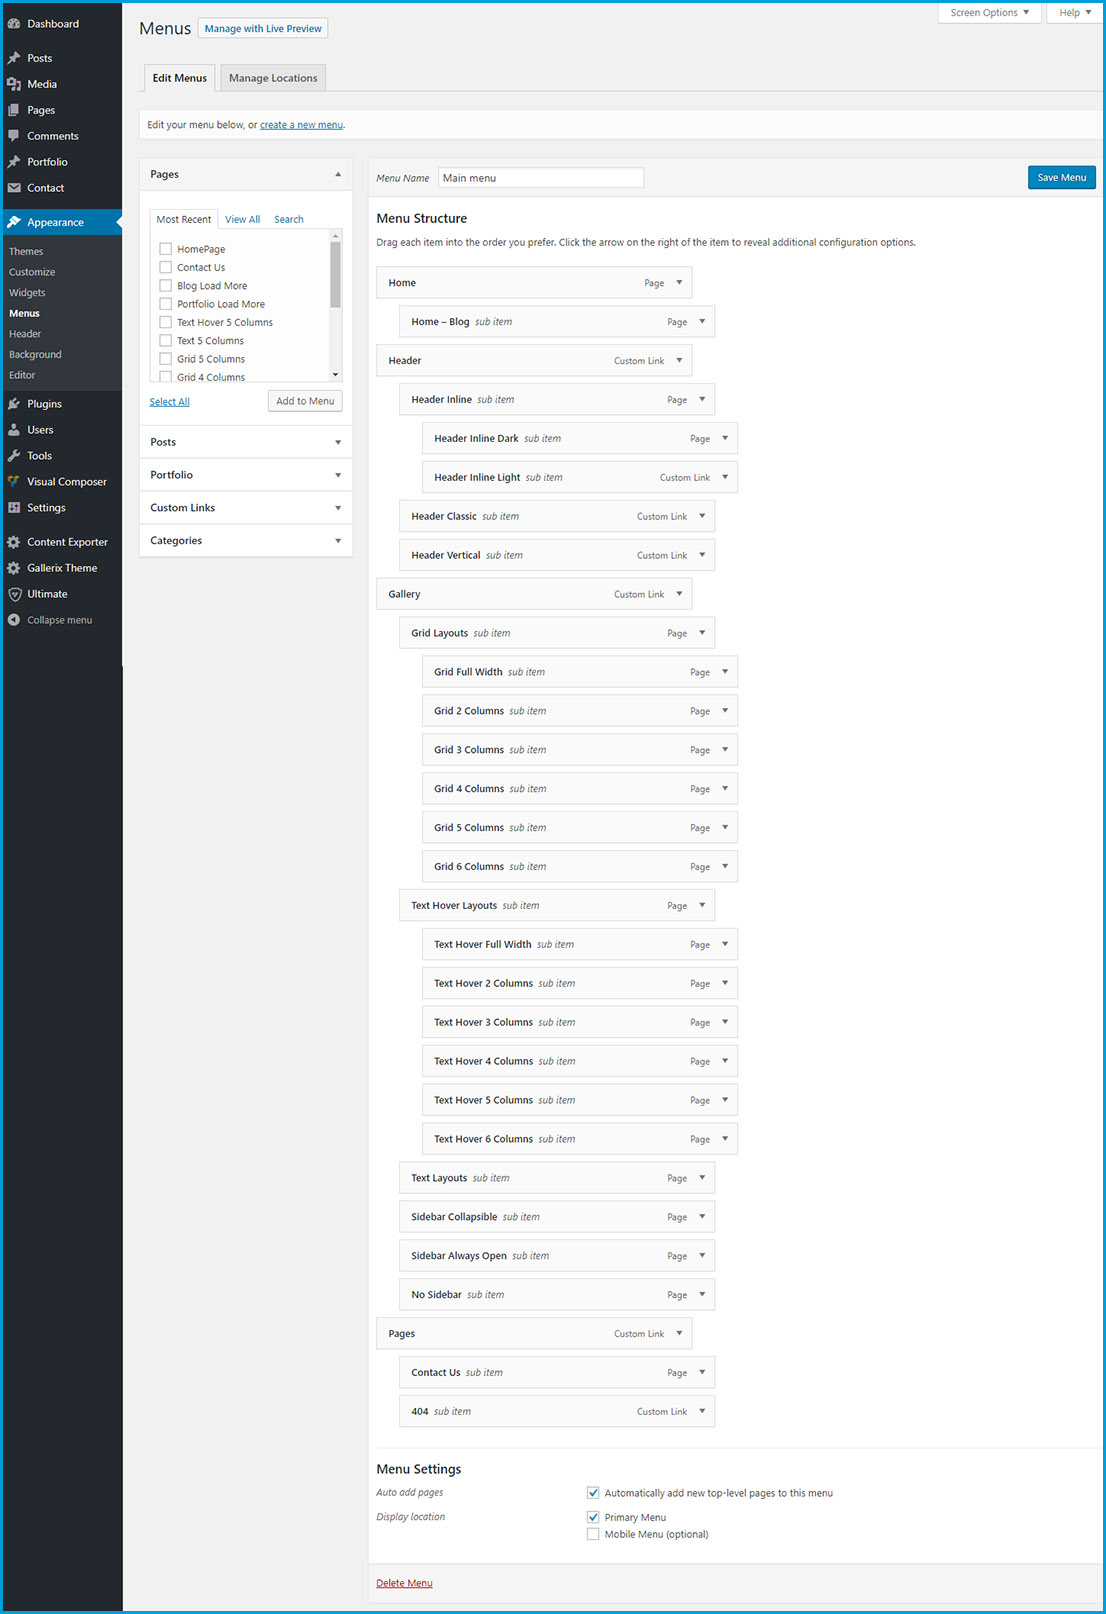
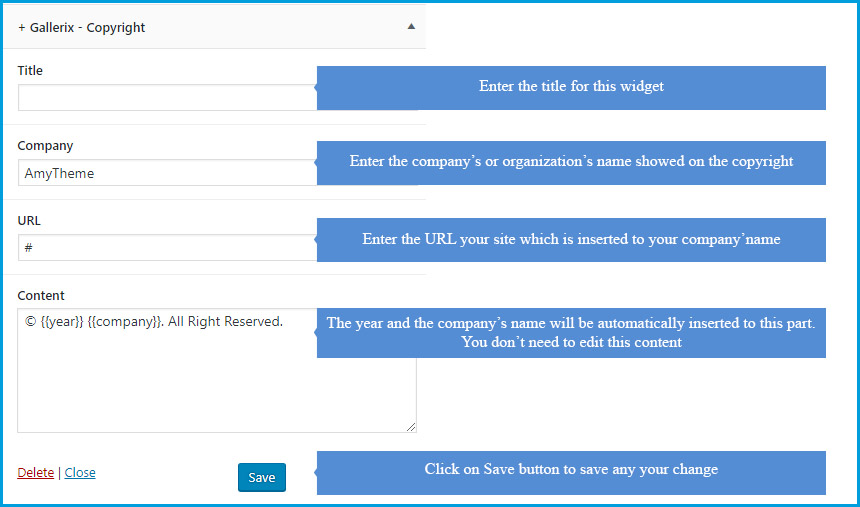
Gallerix - Copyright Widget
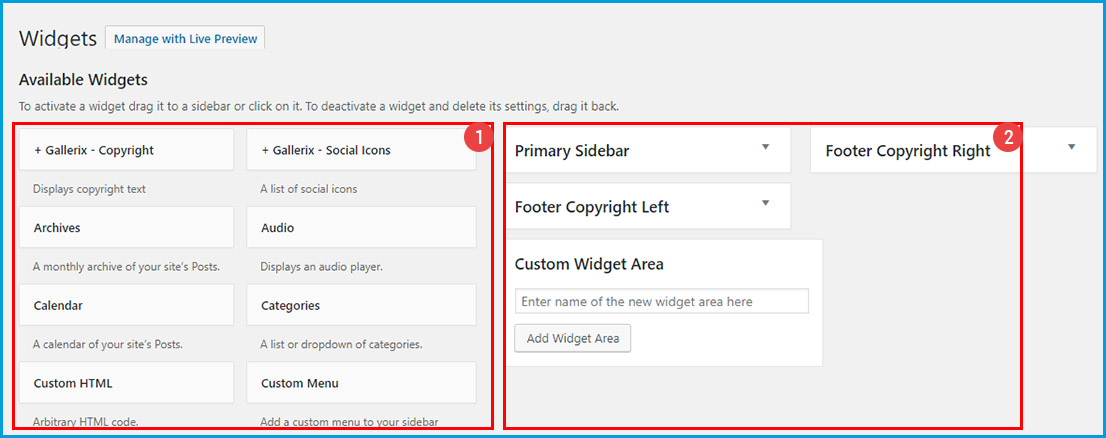
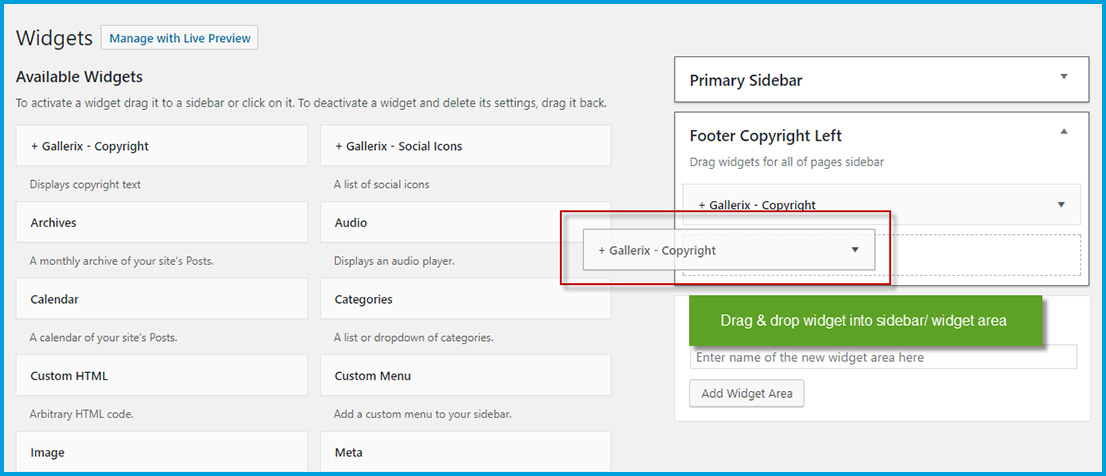
After enable Copyright at the Footer section of Theme Options, from Dashboard => Appearance => Widgets, you will drag and drop Gallerix - Copyright to the copyright widget area
You only need to enter the company’s name and URL, this information will be automatically inserted to the copyright
On the frontend you can see

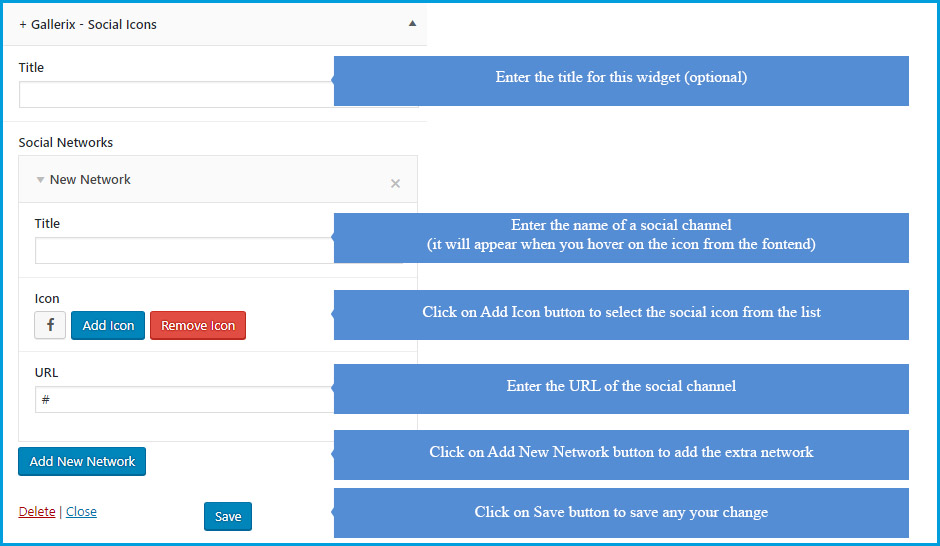
Gallerix - Social Icons Widget
Gallerix - Social Icons allows you adding any social network as you want.
from Dashboard => Appearance => Widgets, you will drag and drop Gallerix - Social Icons to a widget area.
Firstly, please enter the title for the widget, then click on “Add New Network” button, you will see option as the image below
On the frontend you can see